
How to Build a Website from Scratch: The Complete Guide
By Josh Ternyak

March 28, 2026
Building a website from scratch sounds overwhelming — but broken into clear steps, it's totally manageable. This guide walks through every stage from planning to launch, so you know exactly what you're doing and why.
The Project That Feels Bigger Than It Is — Until You Break It Down
There's a reason "build a website" sits on so many people's to-do lists for months or years before anything actually gets done. The scope of the project feels vague and enormous. You don't know where to start. Every time you search for guidance, you get pulled into debates about platforms, tools, and frameworks that assume you've already made decisions you haven't made yet.
Here's the reality: building a website is a sequential process with a clear set of steps. Each step has a defined scope and a clear deliverable. The project becomes manageable the moment you understand what the steps are and what order they go in.
This guide walks through the complete process — from "I need a website" to "my website is live and performing." Whether you're building it yourself or working with a developer, knowing these steps makes you a better decision-maker at every stage.
Step 1: Define Your Goals and Requirements
Before you touch any tools, the most important work happens in a document or a notebook. What is this website supposed to accomplish?
Start with the business goal: what do you want visitors to do? Generate leads for a service business? Purchase products? Book appointments? Read content and build brand awareness? Get directions and a phone number? The goal determines almost everything else about how the site should be structured and what it needs to include.
Then work out your audience: who is coming to this site, what do they know when they arrive, what are they looking for, and what do they need to see to take the action you want? The more specifically you can describe your target visitor, the more targeted your site can be.
Then determine the scope: what pages does the site need? What features? A contact form? A blog? An e-commerce store? A booking calendar? A portfolio gallery? A members-only section? List everything, then ruthlessly prioritize. A site that tries to do everything at launch usually does nothing well. Start with the minimum set of pages and features that achieves the core business goal, and plan expansions for later.
This planning phase is undervalued by almost everyone building a website for the first time, and overvalued in the sense of needing to be perfect before moving on. Spend a day or two on it. Get clarity on goals, audience, and scope. Then move forward.
Step 2: Choose Your Platform and Approach
One of the earliest and most impactful decisions: how will this website be built? Your options broadly fall into a few categories:
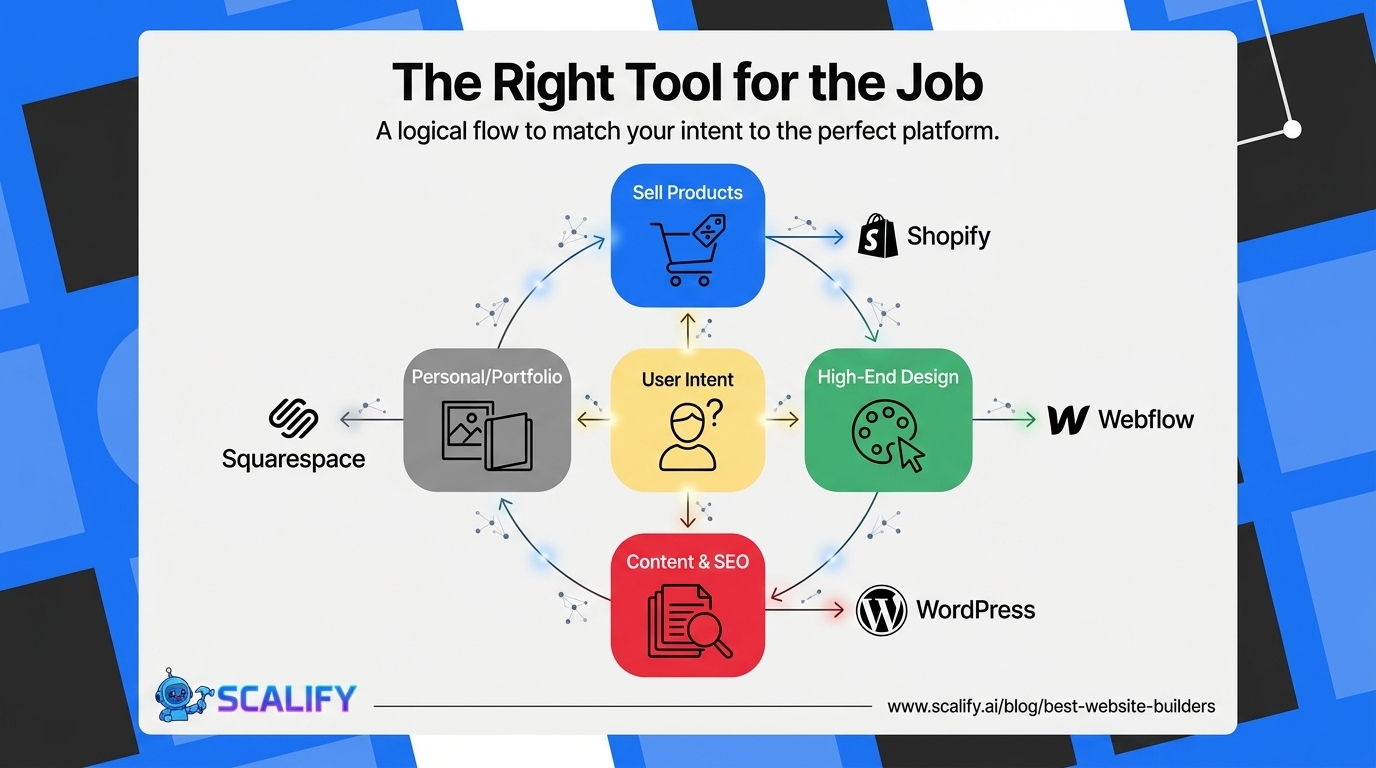
Website builders (Webflow, Squarespace, Wix): Visual, no-code tools where you design and build in a browser-based interface. Best for most small businesses, professionals, and anyone who wants a professional result without writing code. Webflow is the most capable and design-flexible. Squarespace and Wix are easier to get started with but offer less customization. Webflow is the best choice if design quality and long-term flexibility matter.
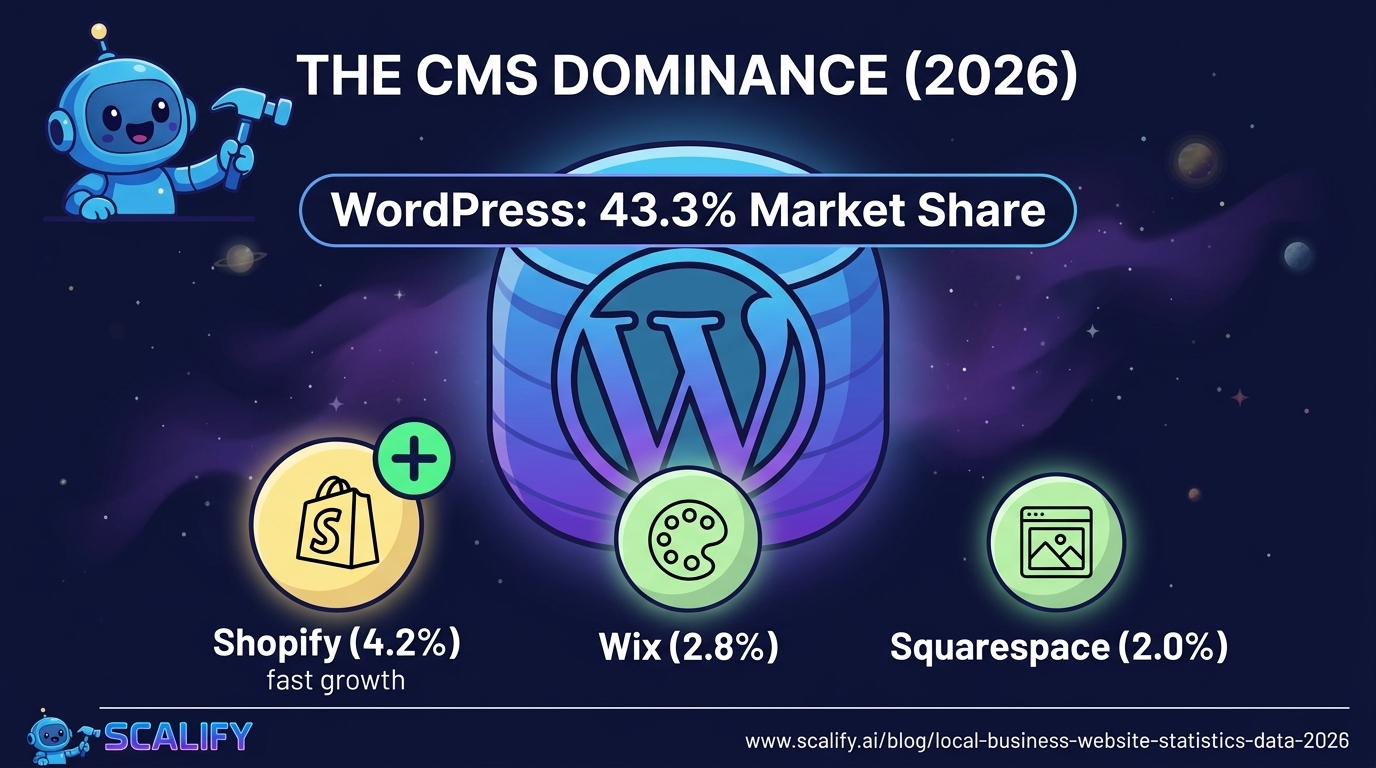
WordPress: The world's most-used CMS, powering 43% of the web. Extremely flexible and extensible, with an ecosystem of themes and plugins for every imaginable feature. Requires more technical comfort than visual builders, especially for hosting, security, and maintenance. Right for businesses that need specific functionality only available through WordPress plugins, or teams already familiar with the platform.
E-commerce platforms (Shopify, WooCommerce): Purpose-built for selling products online. Shopify is the best choice for most e-commerce businesses — reliable, well-supported, with excellent payment processing and inventory management. WooCommerce is WordPress-based and more flexible but more complex to manage.
Custom development: Building from scratch with HTML/CSS/JavaScript, a framework like Next.js or React, and a backend if needed. Right for web applications, complex functionality requirements, or technical teams who need full control. Not the right choice if a website builder or CMS can accomplish the same goals — custom development is slower, more expensive, and more maintenance-intensive.
For the majority of businesses launching a website for the first time: Webflow or Squarespace for service businesses and content sites, Shopify for e-commerce. Make this decision based on your goals and technical comfort level, then commit to it. Platform switching mid-project is costly.
Step 3: Register Your Domain
Your domain name is your address on the internet — and once established, it's with you for the life of your business. Choose carefully: memorable, brandable, appropriate to your industry, and available.
Search availability on a registrar (Namecheap, Google Domains, or your chosen platform if they include domain registration). Aim for .com if available — it's still the credibility standard. .io or .ai are increasingly accepted for tech businesses.
Register for at least 2–3 years. Enable auto-renewal. Turn on WHOIS privacy protection (keeps your personal contact information out of the public domain registry). These three steps protect against the most common domain problems.
If the exact domain you want isn't available, consider: slight variations that still work as a brand name, different TLDs if a .com alternative is unavailable, buying the domain from its current owner (if it's parked and not in use, a reasonable offer often works).
Step 4: Set Up Hosting
Your website needs a home — a server that stores its files and makes them accessible on the internet.
If you're using Webflow, Shopify, or Squarespace, hosting is included in your subscription. Skip this step.
If you're using WordPress, choose a managed WordPress host: Kinsta, WP Engine, or SiteGround are quality options at different price points. Managed hosting includes automatic updates, daily backups, security monitoring, and performance optimization — worth the premium over generic shared hosting for any business site that matters.
For custom builds, the right hosting depends on the technology stack. For static sites: Vercel, Netlify, or Cloudflare Pages are excellent, free-tier capable options. For server-rendered applications: cloud platforms (AWS, Google Cloud, DigitalOcean) or managed hosting services depending on the framework.
Connect your domain to your hosting: add a CNAME record pointing to your platform's hostname (for Webflow, Shopify, etc.) or an A record pointing to your server's IP address (for custom hosting). This step connects "your domain" to "where the site lives."
Step 5: Plan Your Information Architecture
Information architecture is the organizational structure of your website — the pages that exist, how they relate to each other, and how visitors navigate between them.
For most small business sites, the structure is simple: Home, About, Services/Products, Blog, Contact. Each of these might have sub-pages. The navigation mirrors the top-level structure.
For more complex sites, create a proper sitemap document: a visual hierarchy showing every planned page and how they nest. This becomes the blueprint for your navigation and URL structure. It forces clarity about what content is actually needed before you start building.
Think about the primary user journey: what path does an ideal visitor take from first landing on your site to taking the action you want? Map that path and make sure each step is supported by a clear page, clear content, and a clear next action.
Step 6: Design Your Website
Design is where the site starts to look like itself. The scope of this step depends heavily on how you're building.
On website builders: design happens in the builder's interface. You're selecting colors, typography, layout arrangements, and visual style. Most builders provide templates as starting points — choose one that reflects the general direction you want and customize from there. The temptation is to spend weeks in templates; resist it. Pick a direction and build.
With a professional designer: you're typically receiving mockups (static visual designs showing what pages will look like) created in Figma or similar tools. Review these before they're built — it's far cheaper to revise a design mockup than to revise a built page. Be specific in feedback about what to change and why.
Key design decisions: color palette (2–3 colors maximum for a cohesive look), typography (a display font for headlines and a readable body font), visual style (photography vs. illustration, minimal vs. rich), and the overall "feel" you want visitors to experience.
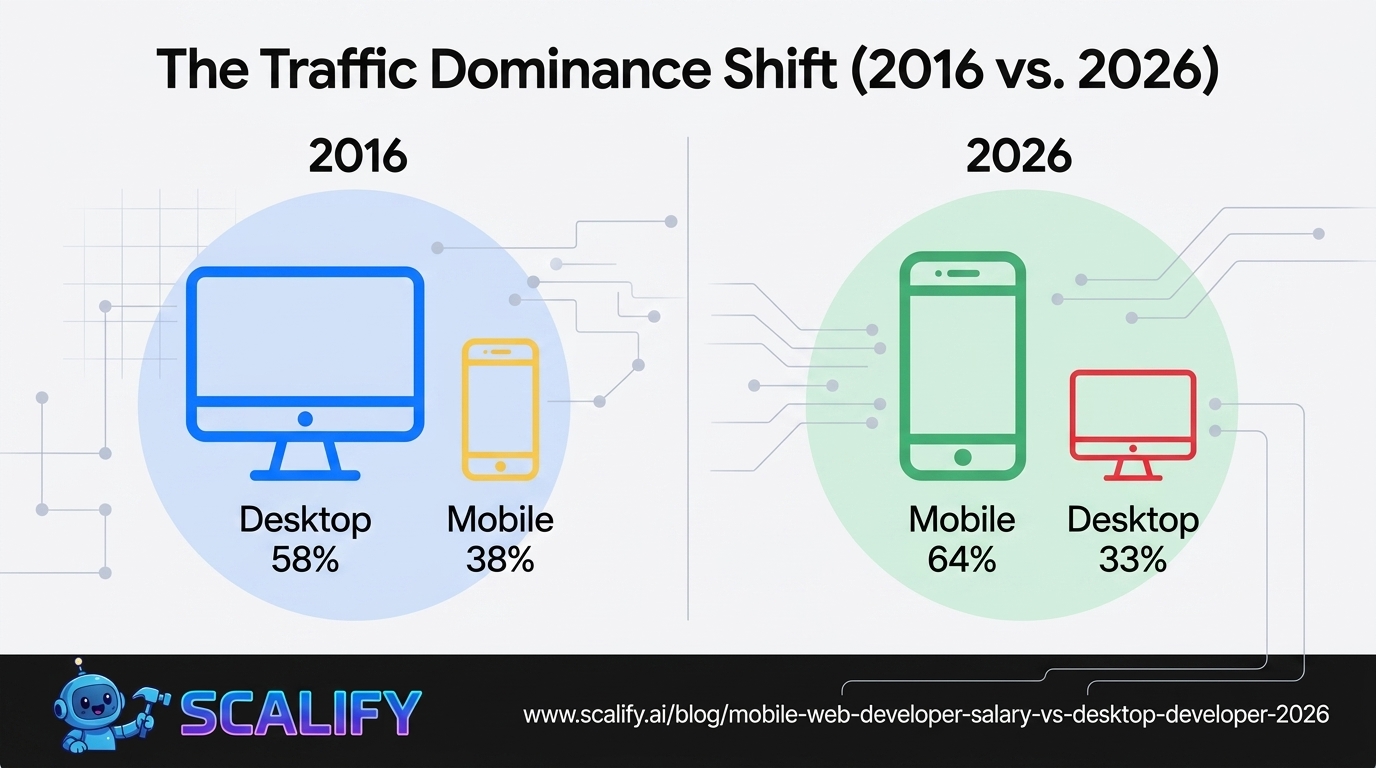
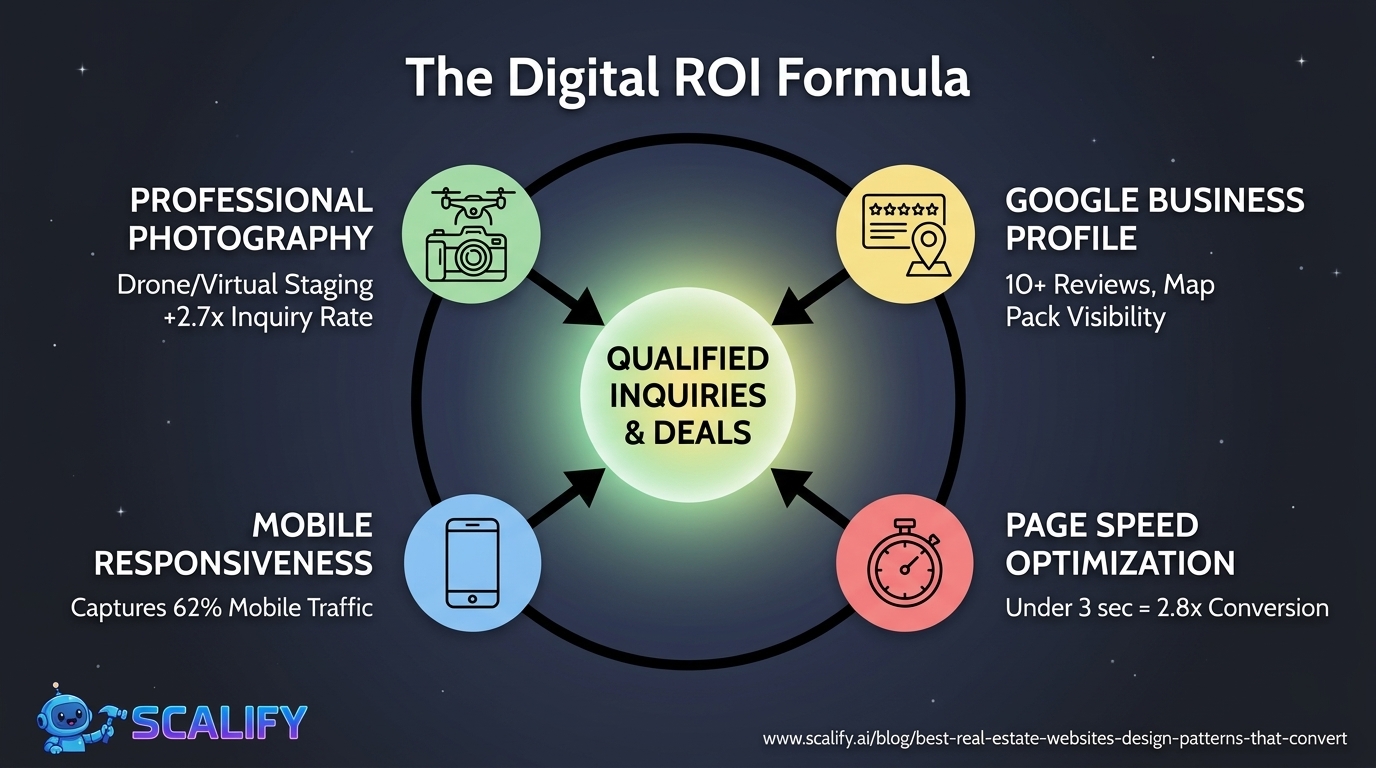
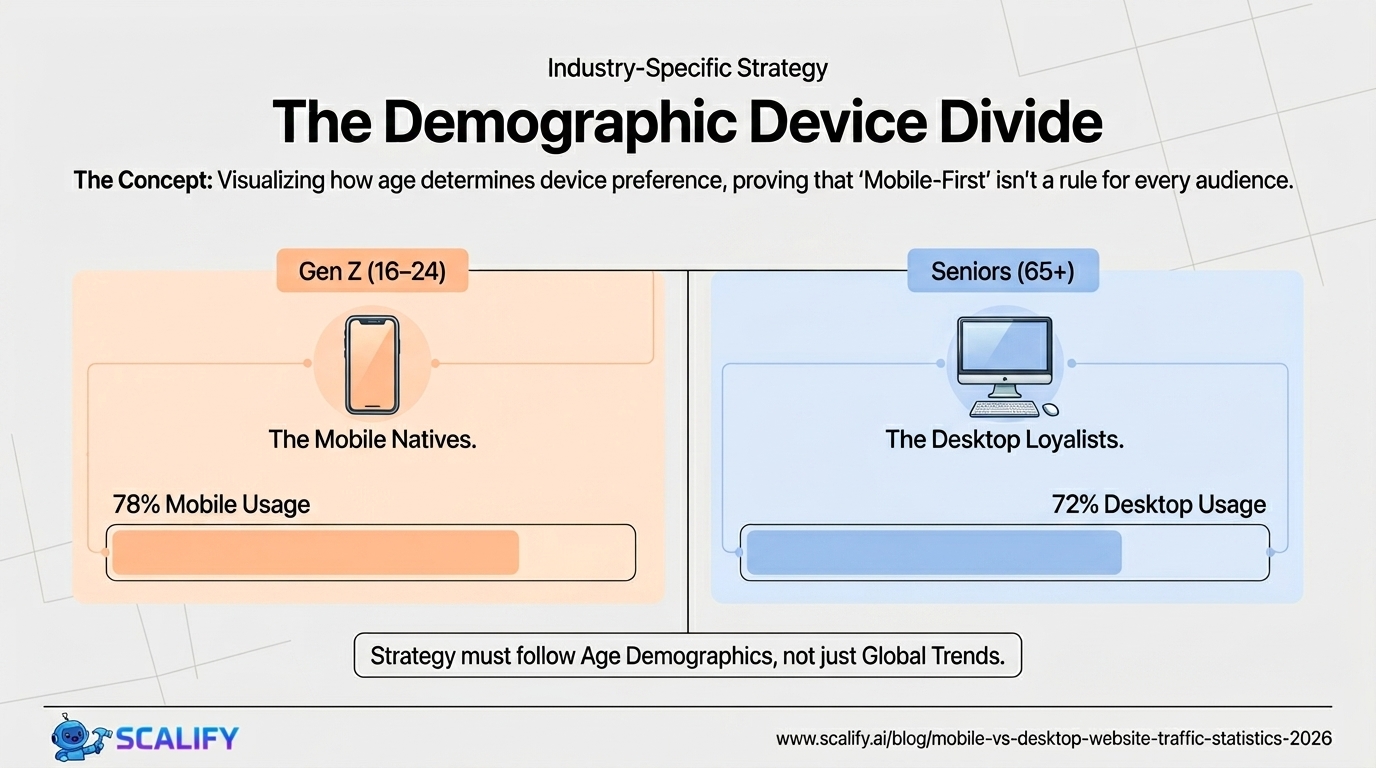
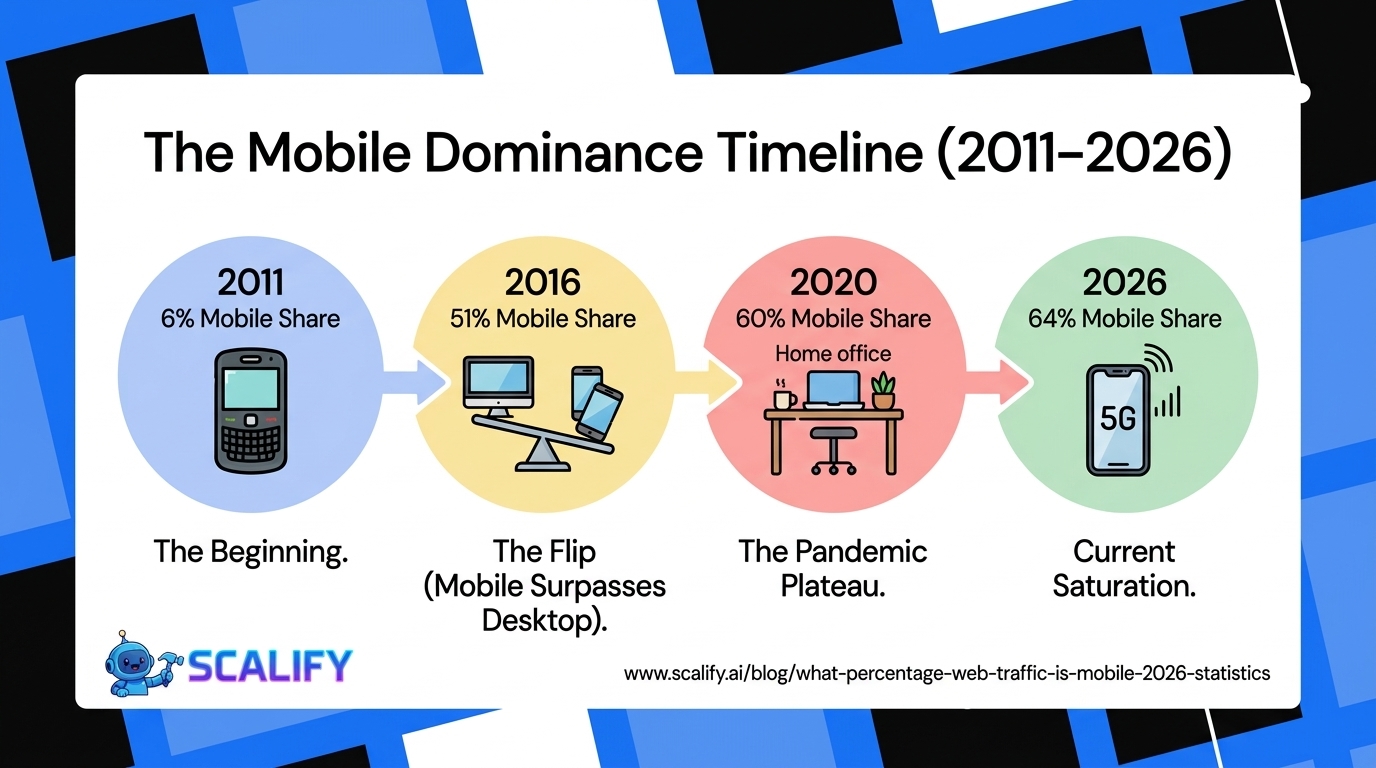
Design for mobile from the start. More than 60% of web traffic is mobile. If you design for desktop first and adapt for mobile, mobile is always the compromise. Design mobile-first — or at minimum, design both simultaneously and treat mobile as equal priority.
Step 7: Write Your Content
Content is the part most people underestimate and underinvest in. A beautifully designed website with weak copy underperforms a simpler design with strong copy. Every time. The words are doing the selling.
Work on content in parallel with design, not after. Content informs design decisions — how much space a section needs, what the headline hierarchy looks like, what images are needed. Starting design without any content leads to placeholder text ("Lorem ipsum") and proportions that don't match the real content when it arrives.
For each page, know: what is the goal of this page? Who is the audience? What do they need to understand? What action do I want them to take? Write content that answers those questions clearly, in your audience's language, without filler.
Specific pages that need careful copy attention:
Homepage headline: The most-read sentence on your site. Must communicate who you are, what you do, and for whom in under 10 words. Don't be clever; be clear.
About page: Not your resume. The story of why the business exists and why that matters to your customers. Make it human and specific.
Services/Products: Describe outcomes, not just features. What changes in the customer's life or business after working with you? Lead with that.
CTAs: Write them last, with the full context of what you're asking visitors to do and why it's worth doing. Specific beats generic every time.
Step 8: Build the Site
With planning complete, domain registered, hosting set up, architecture mapped, design decided, and content drafted — building is almost mechanical. You're executing decisions already made.
Build in this order: global elements first (header, footer, navigation — these appear on every page), then the homepage (highest importance, sets the tone), then interior pages (services, about, etc.), then supporting pages (blog, contact, legal).
As you build, test constantly: check every page on desktop and mobile at multiple screen sizes. Check every link. Check every form. Make sure images load correctly, text is readable, spacing looks right, and the navigation works.
Performance considerations during build: compress all images before uploading (or use the platform's compression if it does it automatically). Only add third-party scripts and tools you actually need — every addition affects load time. Enable SSL (HTTPS) as you set up the domain.
Step 9: Set Up Analytics and Essential Tools
Before launch, connect the tools that will help you understand and improve the site's performance:
Google Analytics 4: Tracks visitors, sessions, traffic sources, page performance, and conversion events. The baseline for understanding how your site is being used.
Google Search Console: Monitors your site's presence in Google search — what queries drive traffic, which pages are indexed, any crawl errors or issues. Submit your sitemap here after launch.
Heatmap / Session Recording (optional but valuable): Tools like Hotjar or Microsoft Clarity show you where visitors click, how far they scroll, and recordings of actual visitor sessions. Invaluable for identifying UX problems.
Form notifications: Ensure every contact form is set up to email you when someone submits it. Test every form before launch — a form that silently fails is a lead generation disaster.
Step 10: Pre-Launch Quality Assurance
Before you publish, systematically check every element:
Functionality: Click every link. Submit every form. Test every interactive element. Check that confirmation emails send when forms are submitted. Test checkout if e-commerce. Verify downloads work.
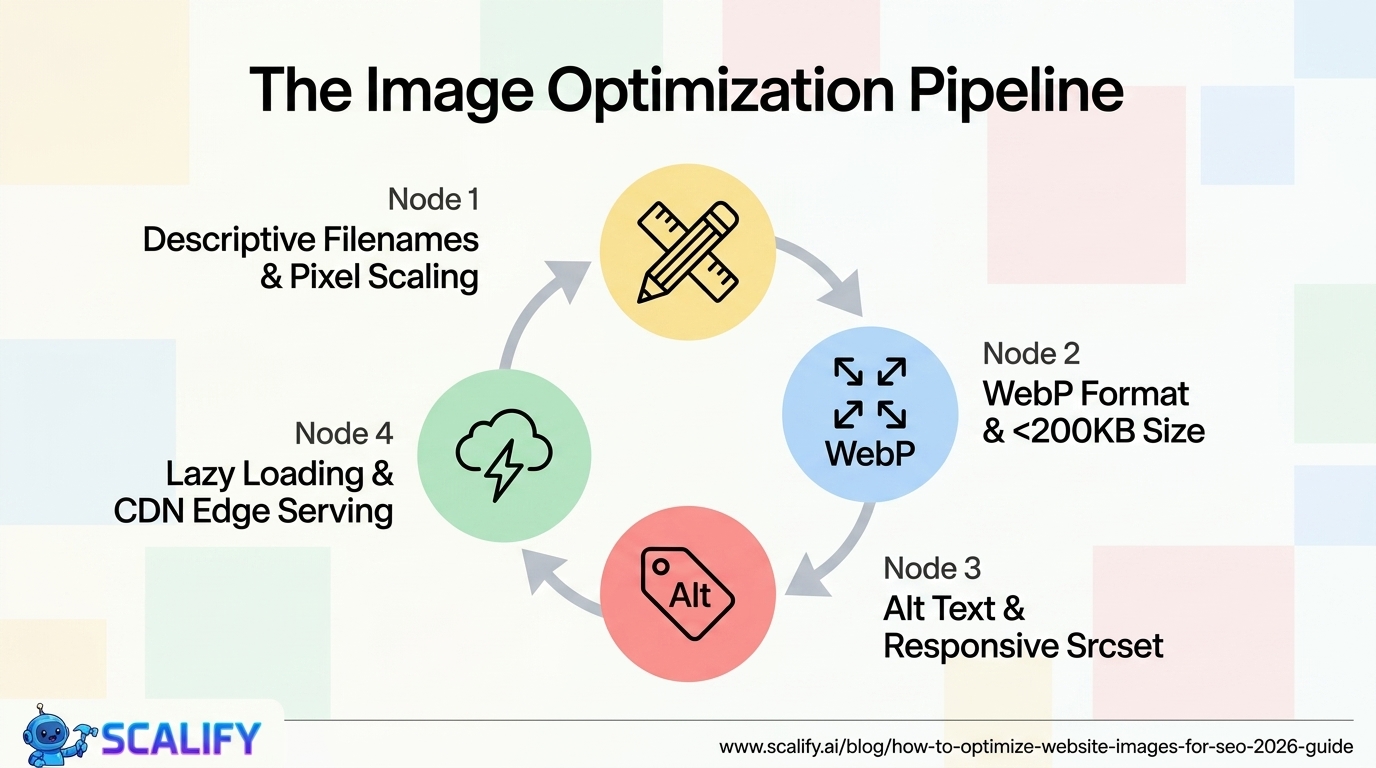
Content: Read every page. Check for typos, inconsistencies, placeholder text left in accidentally. Ensure contact information is accurate. Check that every image has an alt text (accessibility and SEO).
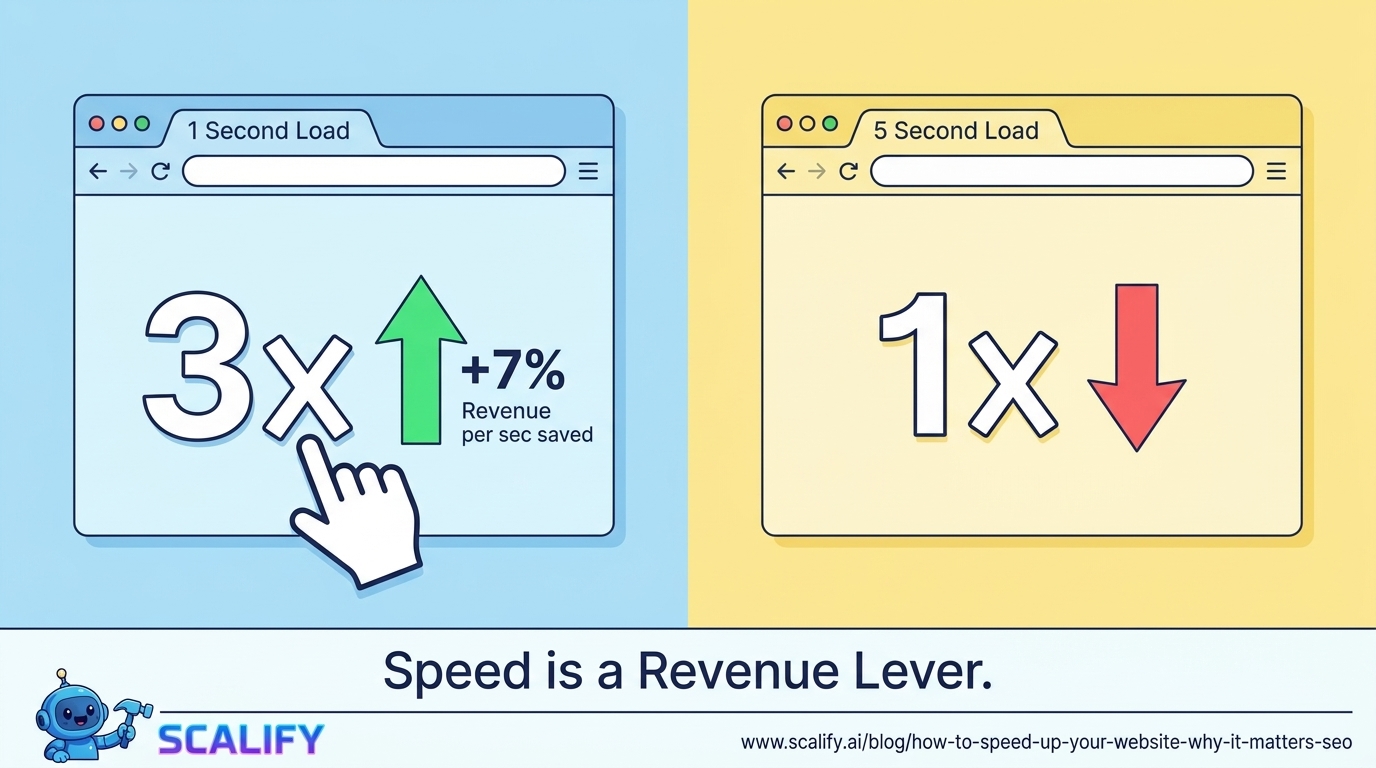
Performance: Run through Google PageSpeed Insights and address any critical issues. Check load time on a mobile device on a real mobile connection (not just WiFi).
Cross-browser: Check the site in Chrome, Safari, and Firefox at minimum. Check on both desktop and mobile. Safari on iOS in particular has CSS behaviors that differ from Chrome.
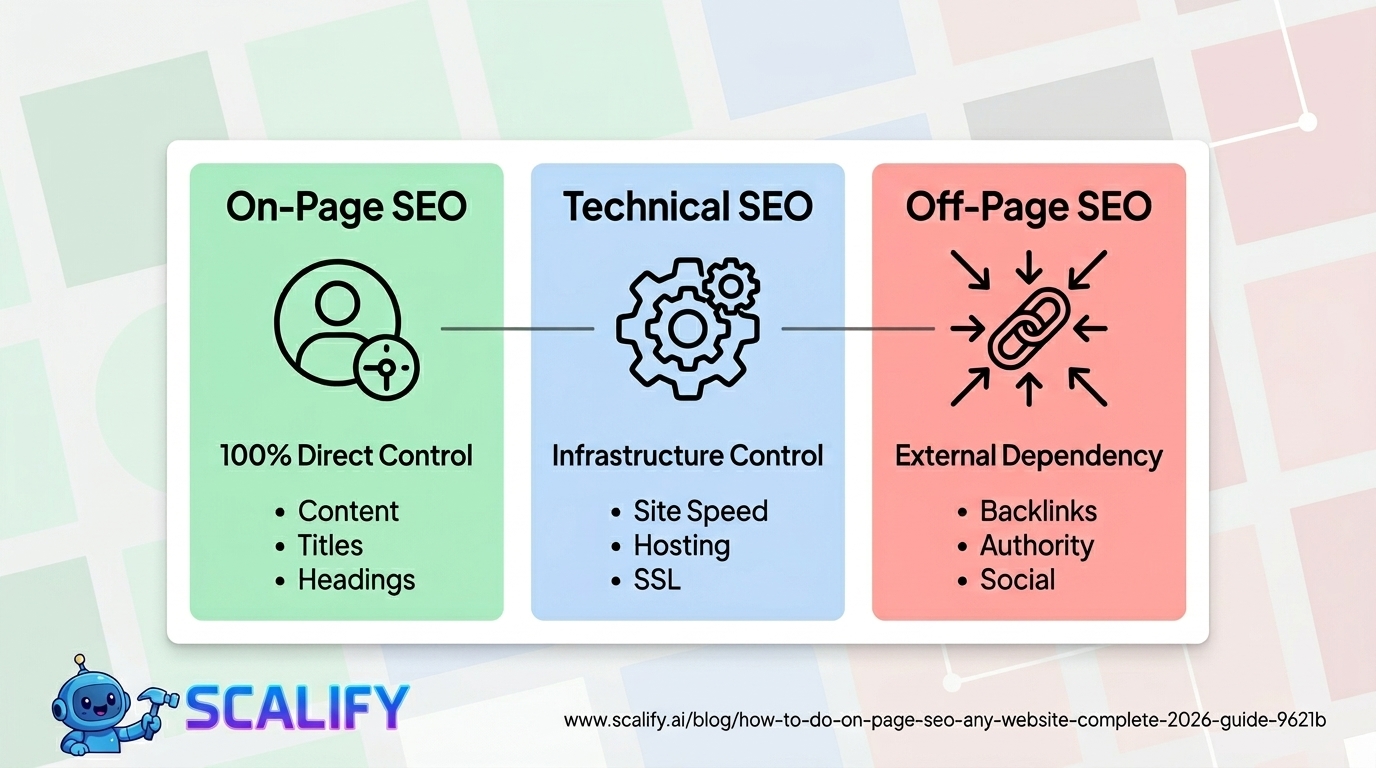
SEO basics: Verify each page has a unique title tag and meta description. Check that the sitemap exists and is accessible at /sitemap.xml. Confirm HTTPS is active and HTTP redirects to HTTPS. Verify the canonical URL is configured correctly.
Step 11: Launch
When you've ticked every item in your QA checklist: go live. If using a platform, click the Publish button. If using custom hosting, point your domain's DNS to the live server and confirm propagation.
Announce it: send an email to relevant contacts, post on social media, share in any communities or groups where it's appropriate. The first traffic to a new site matters — early engagement signals can influence how quickly Google begins indexing and ranking it.
Submit your sitemap to Google Search Console immediately after launch. This prompts Google to begin crawling and indexing your content rather than waiting for Googlebot to discover it organically.
Step 12: Iterate and Improve
Launch is not the finish line — it's the starting line. Real user behavior will reveal things you couldn't predict during planning and building. Check your analytics weekly for the first month. Where are visitors dropping off? Which pages have the highest exit rates? Which CTAs are getting clicks and which are being ignored?
Use the data to make improvements. Change a headline that isn't communicating clearly. Improve a page that has a high bounce rate. Add content to answer questions that visitors are searching for but not finding. A website that improves continuously outperforms one that was "finished" at launch within months.
The Bottom Line
Building a website from scratch has 12 clear steps: define goals, choose a platform, register a domain, set up hosting, plan information architecture, design, write content, build, set up analytics, run QA, launch, and iterate. Done in sequence, with appropriate attention to each step, the process is achievable by anyone — with or without technical expertise.
The alternative to doing it yourself: working with a professional service that handles these steps for you. Scalify delivers custom professional websites by handling every step in this process — from planning and design through build, QA, and launch — so you get the result without the project management overhead.


.jpeg)
.jpeg)


78 SW 7th St, Miami, FL 33130