How to Optimize Website Images for SEO (2026 Complete Guide)
By Josh Ternyak

April 18, 2026
Complete image SEO guide 2026.
Why Image SEO Matters
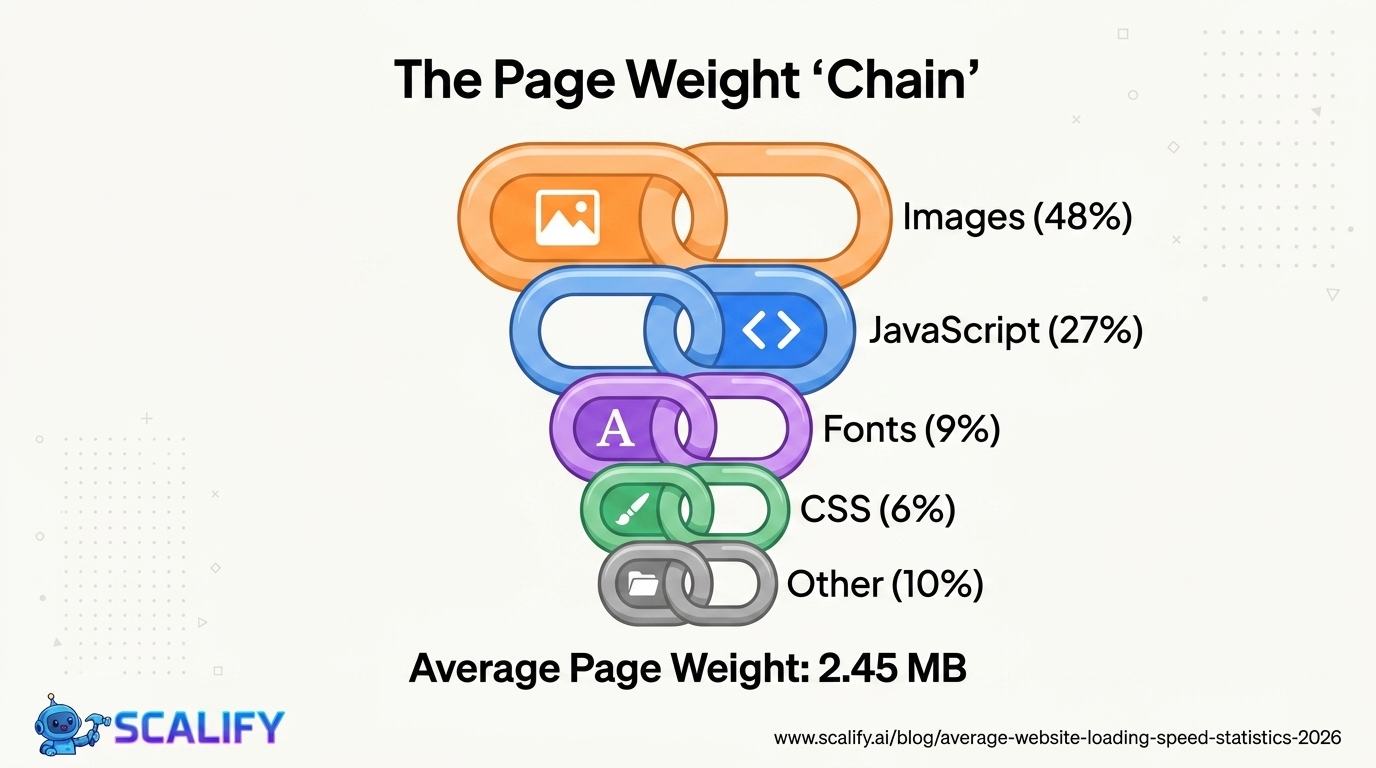
Images play a larger role in website SEO than most website owners realize. Beyond the obvious visual function, images affect organic performance across multiple dimensions: they account for 60–80% of page weight and are the primary determinant of LCP (Largest Contentful Paint) performance, a Core Web Vitals ranking factor. They can rank in Google Image Search, generating additional traffic beyond standard web search. And their alt text contributes to on-page keyword relevance signals that help the page rank for its target queries.
Image optimization is one of the highest-ROI SEO improvements available to most websites — because most websites have poorly optimized images, and the fixes are largely technical with significant performance gains.
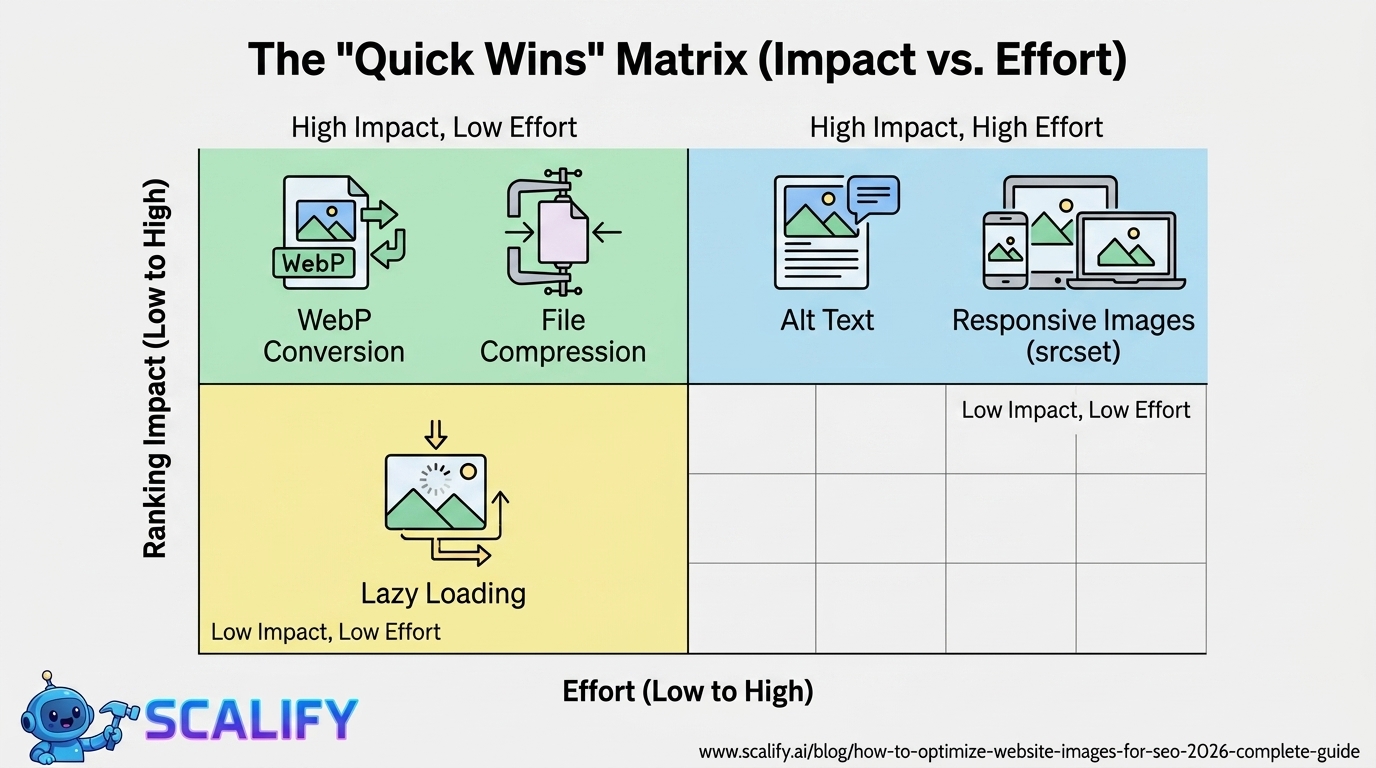
Image SEO: Complete Factor Checklist
Image SEO FactorRanking ImpactEffortFile compression and sizeHigh — affects LCP/Core Web VitalsLow — tools automate thisWebP format conversionHigh — faster loading = better CWVLow — one-time or automatedAlt textMedium-High — accessibility + keyword signalLow — text entryFile nameMedium — pre-upload descriptionLow — rename before uploadingCorrect dimensions (match display)Medium — avoids oversized downloadsLow — resize before uploadLazy loadingMedium — improves initial page loadVery Low — single HTML attributeImage sitemapMedium — helps Google Image Search indexingMedium — plugin or manualStructured data (Product/Recipe images)Medium — enables rich resultsMedium — Schema implementationResponsive images (srcset)Medium — correct size per deviceMedium — HTML implementation
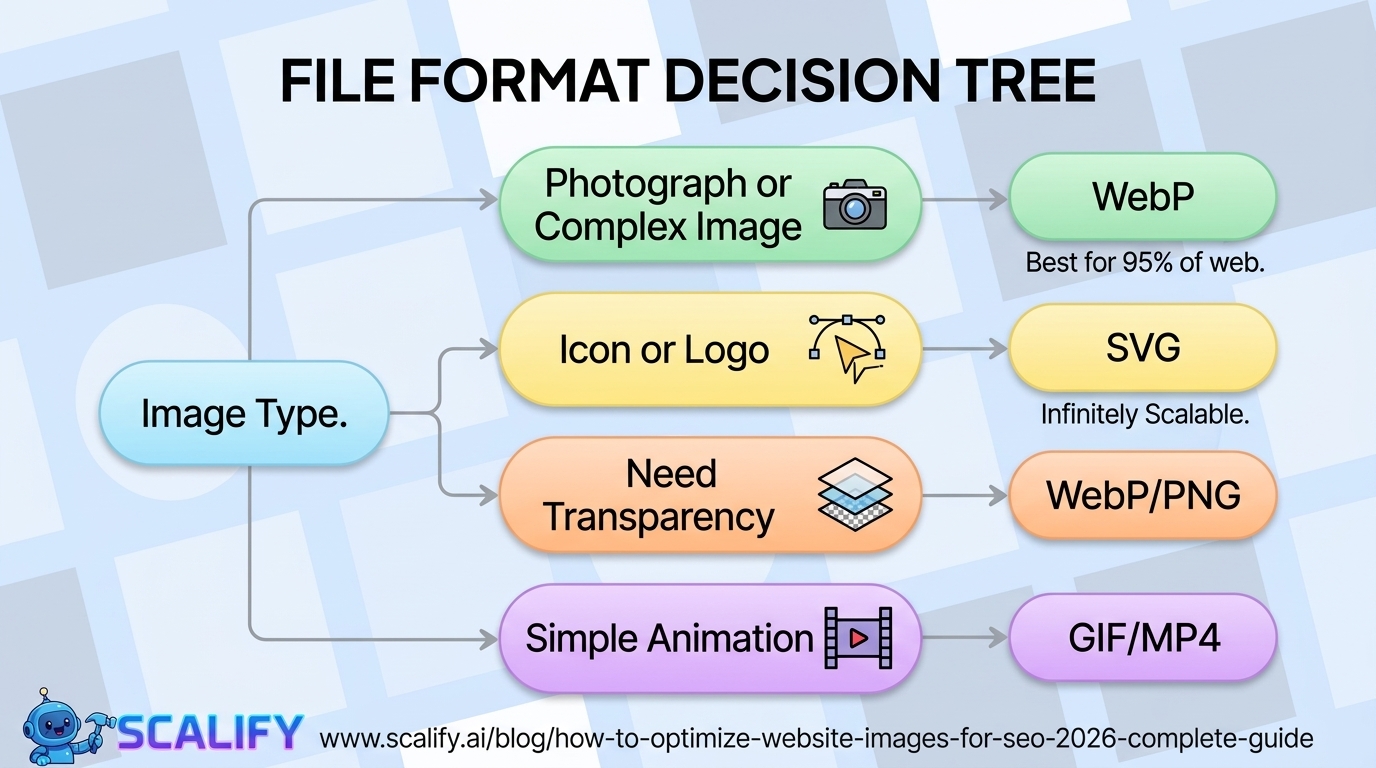
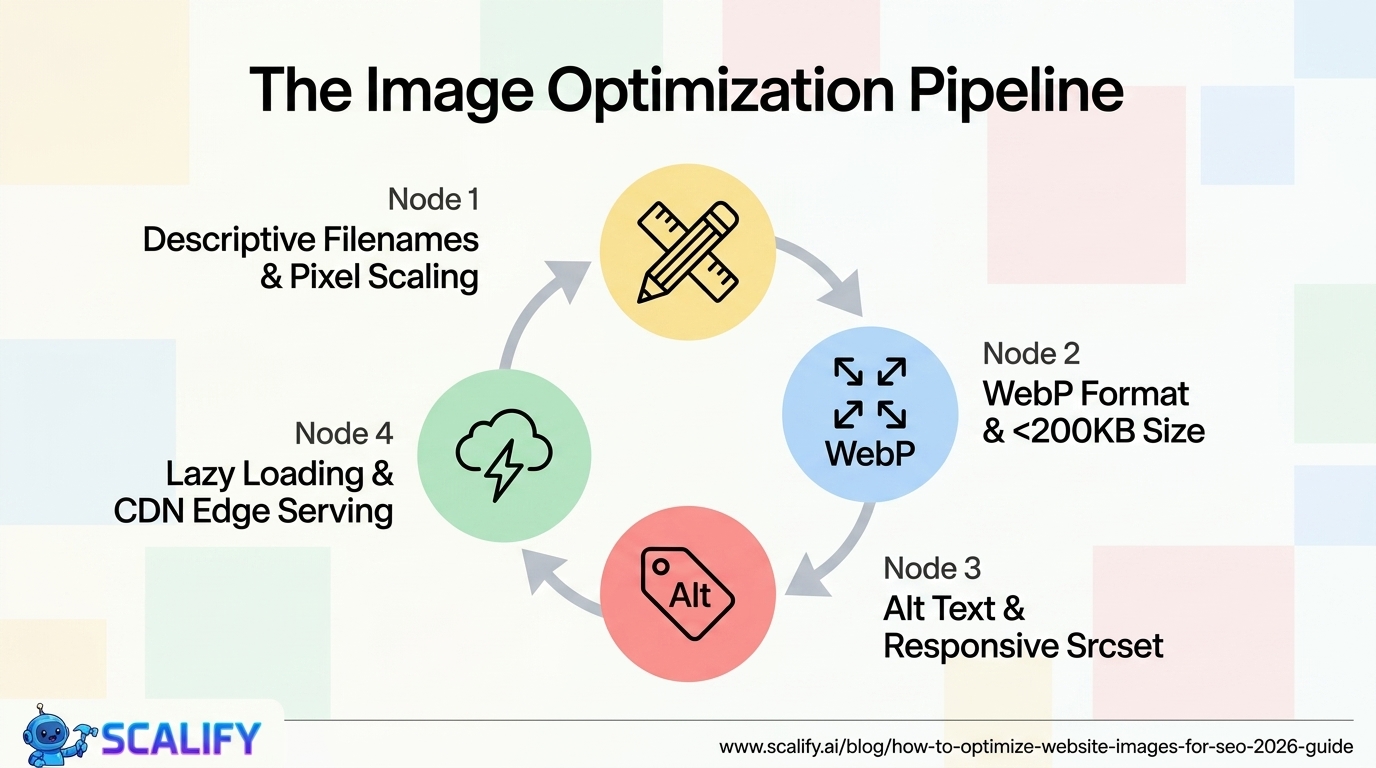
Step 1: Choose the Right File Format
FormatBest Use CaseNotesWebPAll photographs and complex images (recommended)25–35% smaller than JPEG; widely supported (95%+ browsers)AVIFPhotography (next-gen, even smaller than WebP)Smaller than WebP; slightly less browser supportJPEG/JPGPhotographs when WebP not availableLossy compression; good file size at 70–80% qualityPNGImages requiring transparency; logosLossless; can be large — consider WebP with transparencySVGIcons, logos, simple graphicsVector format; infinitely scalable; tiny file sizeGIFSimple animations (prefer MP4 or WebM for complex)Very large for complex animations; avoid for photos
The recommendation for 2026 is to convert all photograph and complex image assets to WebP. The format is supported by 95%+ of browsers, produces files 25–35% smaller than equivalent JPEG quality, and the conversion is a one-time process for existing images that pays dividends in faster load times for the life of the site.
Step 2: Compress Images Before Uploading
ToolTypeBest ForCostSquoosh.appBrowser-basedManual optimization of individual images; WebP conversionFreeTinyPNG / TinyJPEGBrowser-based / APIQuick bulk compression; JPEG and PNGFree (500/mo); paid APIShortPixelWordPress plugin / APIBulk optimization of existing library + new uploadsFrom $4.99/moImagifyWordPress pluginAuto-optimize on upload; WebP generationFree plan; paid from $4.99/moEWWW Image OptimizerWordPress pluginFree option with good resultsFree core; paid for WebPCloudflare PolishCDN-levelAutomatic compression and WebP conversion at CDNCloudflare Pro ($25/mo)
Target file sizes by image type:
Step 3: Use Correct Image Dimensions
One of the most common image performance mistakes is uploading a 3,000px wide image that will be displayed at 800px. The browser still downloads the full-resolution image, wasting bandwidth proportional to the pixel area difference — which in this case is a 14x size difference (3000 × 3000 vs 800 × 800 in total pixels).
Best practice: Resize images to their maximum display dimension before uploading. If an image will display at a maximum of 1,200px wide on desktop, upload at 1,200–1,600px (2x for retina screens). If it will display at 400px, upload at 800px. Never upload at full camera resolution (5,000–8,000px) for a web image.
Step 4: Write Effective Alt Text
Alt text (the alt attribute on an img tag) serves two purposes: it describes the image to visually impaired users via screen readers (accessibility), and it provides Google with text to understand what the image depicts (SEO). Both matter.
Alt Text PracticeGood ExampleBad ExampleDescribe what the image showsalt="Miami skyline at sunset from Brickell"alt="image1.jpg"Include keyword where naturalalt="website design process wireframe sketch"alt="website design website website"Keep it concise (under 125 chars)alt="Scalify.ai homepage on MacBook Pro"Long paragraph of keyword-stuffed textDecorative images get empty altalt=""alt="decorative blue background"Don't start with "image of" or "photo of"alt="team meeting in Miami office"alt="Image of a team meeting"
The keyword-stuffed alt text approach — writing every alt attribute as a list of target keywords — is an outdated tactic that Google's algorithms are designed to detect and discount. Natural, descriptive alt text that includes keywords where they genuinely describe the image is the correct approach, and it also ensures accessibility compliance (which has its own legal and SEO implications).
Step 5: Optimize Image File Names
Image file names are an SEO signal Google uses before the image is even on the page. A descriptive file name tells Google's image crawler what the image depicts before it examines the image itself.
File Name PracticeGoodBadUse descriptive keywordsmiami-website-designer-portfolio.webpDSC_004821.jpgUse hyphens between wordsresponsive-web-design-example.webpresponsive_web_design_example.jpgKeep reasonably shortscalify-website-builder.webpscalify-affordable-professional-website-builder-miami-florida.jpgLowercase onlyweb-design-portfolio.webpWeb-Design-Portfolio.JPEG
Step 6: Implement Lazy Loading
Lazy loading defers the loading of images that are not visible in the user's viewport (below the fold) until the user scrolls toward them. This reduces initial page weight and improves LCP by prioritizing the images that are visible immediately.
Implementation couldn't be simpler:
img src="below-fold-image.webp" alt="Description" loading="lazy"
Important exception: Do NOT use lazy loading on the LCP image — the primary hero image or largest visible image above the fold. Lazy loading the LCP image will delay its loading and hurt your LCP score. Use lazy loading for all below-fold images, not the above-fold hero image.
Step 7: Implement Responsive Images with srcset
The srcset attribute allows you to provide multiple image versions for different screen sizes and resolutions. The browser then downloads only the appropriately-sized version for the device, saving bandwidth and improving performance on mobile.
img
  src="hero-800.webp"
  srcset="hero-400.webp 400w, hero-800.webp 800w, hero-1600.webp 1600w"
  sizes="(max-width: 600px) 100vw, 800px"
  alt="Professional website design by Scalify"
Most modern CMS platforms (WordPress, Webflow, Shopify) handle responsive images automatically when you upload images at the correct maximum dimensions. The manual implementation above is primarily needed for custom-coded websites.
Step 8: Google Image Search Optimization
Google Image Search drives a meaningful volume of traffic for certain website categories — photography, product-based businesses, recipes, travel, fashion, home design, and any content where people search with visual intent. Optimizing for Google Image Search requires:
Google Image Search FactorHow to OptimizeDescriptive file nameKeyword-relevant, hyphenated (see Step 5)Alt textAccurate, descriptive, includes keyword (see Step 4)Surrounding page textPage content contextualizes the image for GoogleImage title attributeOptional; adds supporting descriptionImage sitemapHelps Google discover and index images, especially on JS-heavy sitesStructured data (where applicable)Product schema with image property, Recipe schema, etc.High-quality unique imagesStock photos rank poorly vs. unique images
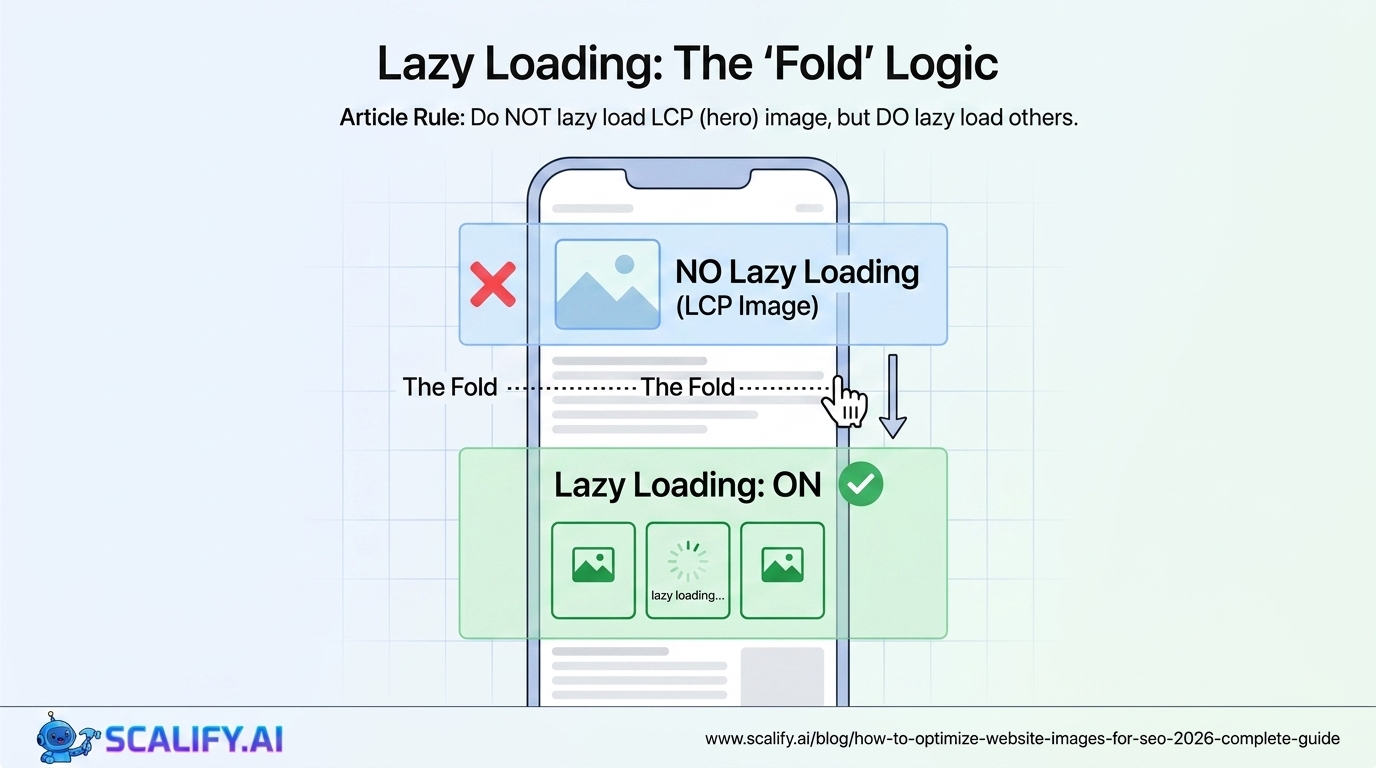
Image SEO for Different CMS Platforms
PlatformImage Optimization ApproachRecommended ToolsWordPressPlugins handle compression, WebP, lazy load, alt textShortPixel or Imagify + SmushWebflowBuilt-in compression and lazy loading; upload WebP directlyPre-compress before upload; Webflow handles restShopifyAuto-generates multiple sizes; limited WebP conversionPre-compress before upload; TinyIMG appSquarespaceAuto-resizes; upload at correct max dimensionsPre-compress before uploadCustom HTML/CSSFull manual control; implement srcset, lazy loadSquoosh.app for conversion; implement HTML attributes manually
Auditing Existing Images for SEO Issues
For websites with existing image libraries, an audit typically reveals multiple high-impact optimization opportunities:
The Bottom Line
Image SEO in 2026 operates across three dimensions that collectively determine significant amounts of organic traffic and conversion performance: Core Web Vitals performance (where images are the largest lever), on-page keyword relevance (where alt text and file names contribute), and Google Image Search visibility (where unique, properly marked-up images drive additional traffic). The highest-impact, lowest-effort improvements are: converting all photographs to WebP, compressing images before upload, adding descriptive alt text to all images, and implementing lazy loading on below-fold images. For most websites with existing unoptimized image libraries, implementing these four improvements alone produces meaningful LCP improvements, better Core Web Vitals scores, and increased accessibility compliance.
At Scalify, image optimization is part of our standard website build process — properly compressed, correctly named, lazily loaded, and alt-tagged from day one so clients start with a fast, search-optimized image foundation.
Top 5 Sources
Building a Sustainable Digital Marketing System
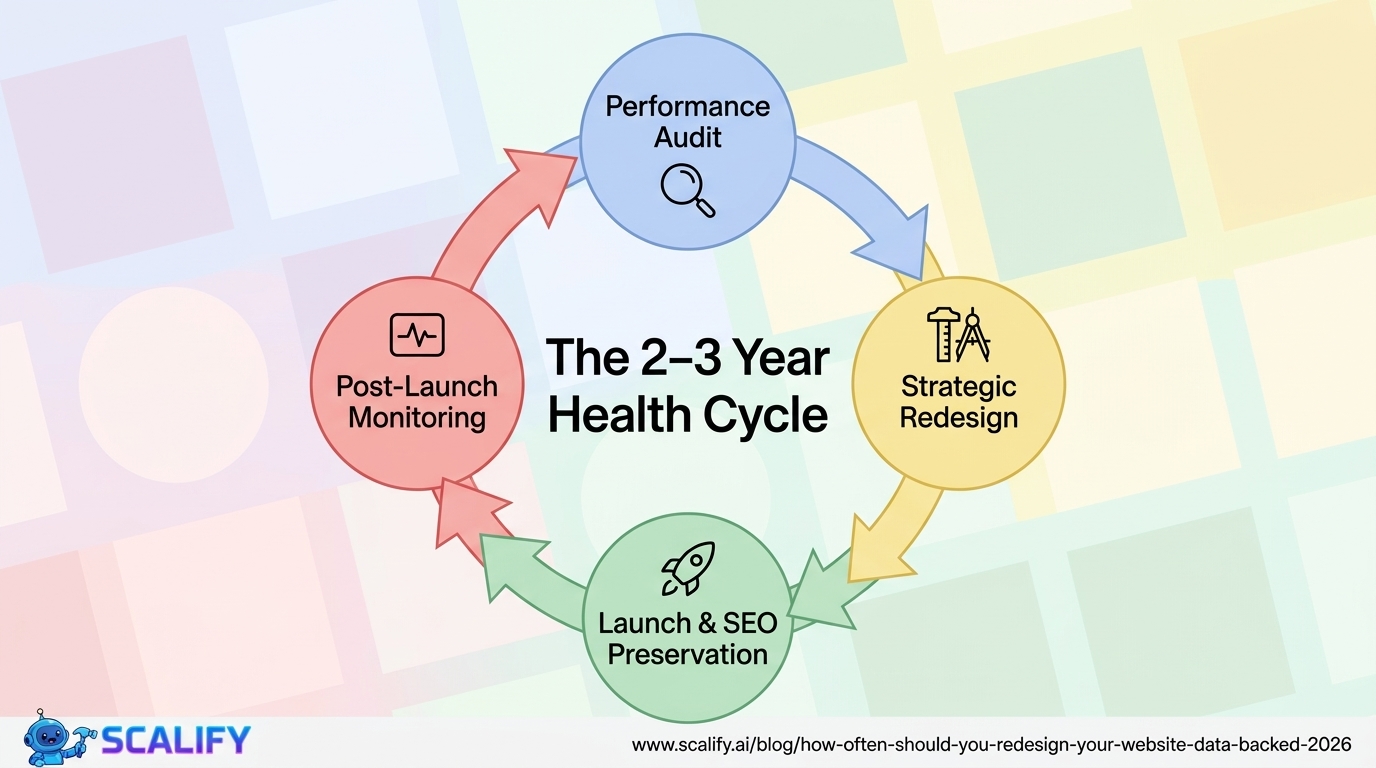
The most effective websites are not built once and left static — they're living systems that improve continuously as the business learns what resonates with its audience, what converts visitors, and what generates organic traffic. Building this improvement discipline requires three things: measurement infrastructure that makes performance visible (Google Analytics 4, Search Console, Core Web Vitals monitoring), a regular cadence of improvement work (monthly or quarterly audits and optimization cycles), and the willingness to make changes based on what the data shows rather than aesthetic preferences or past decisions.
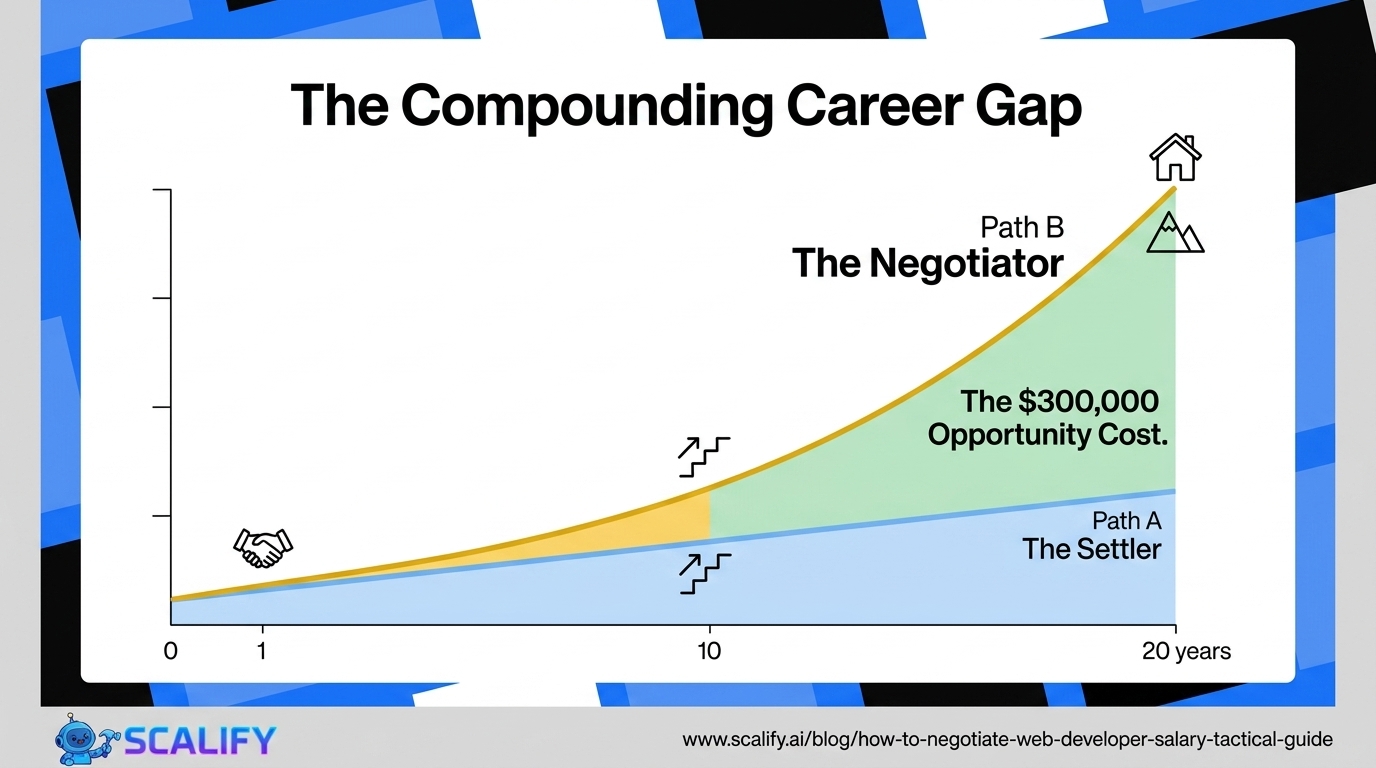
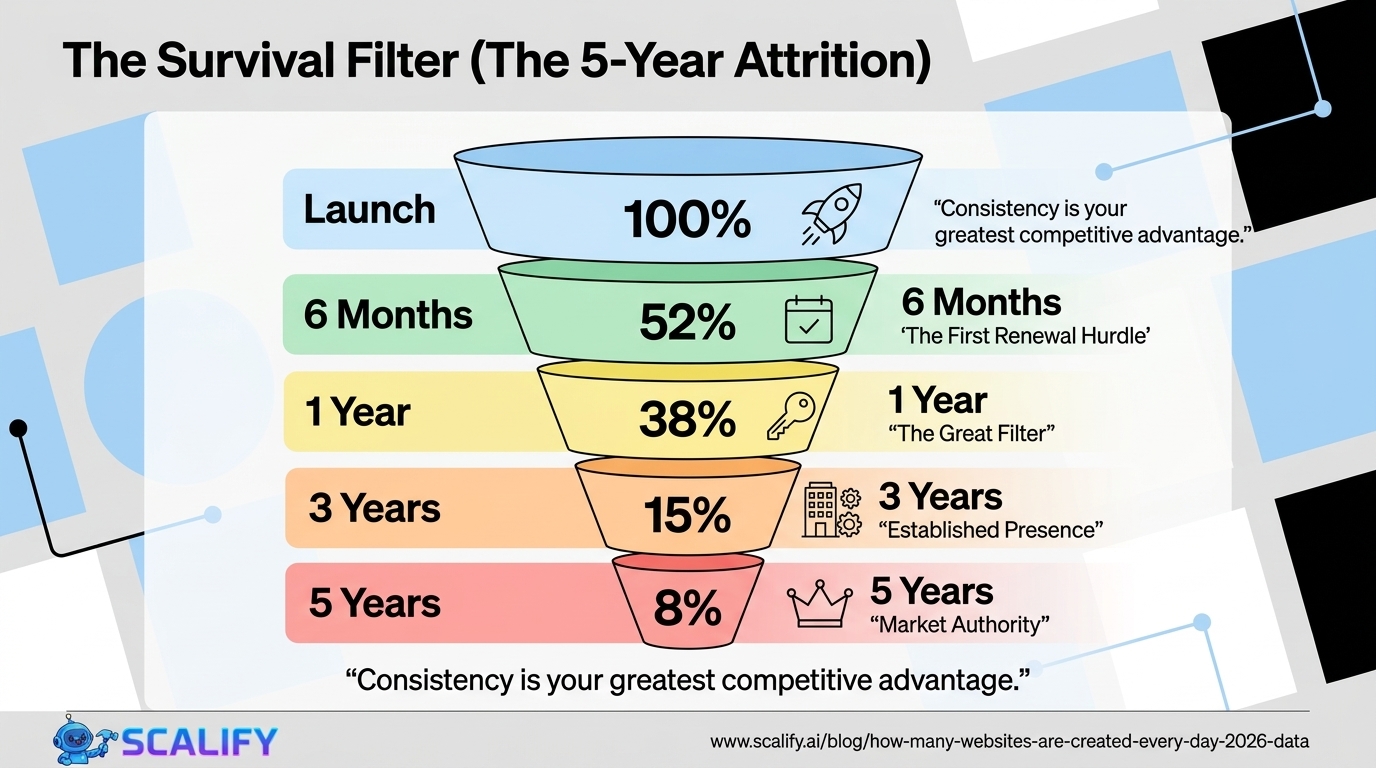
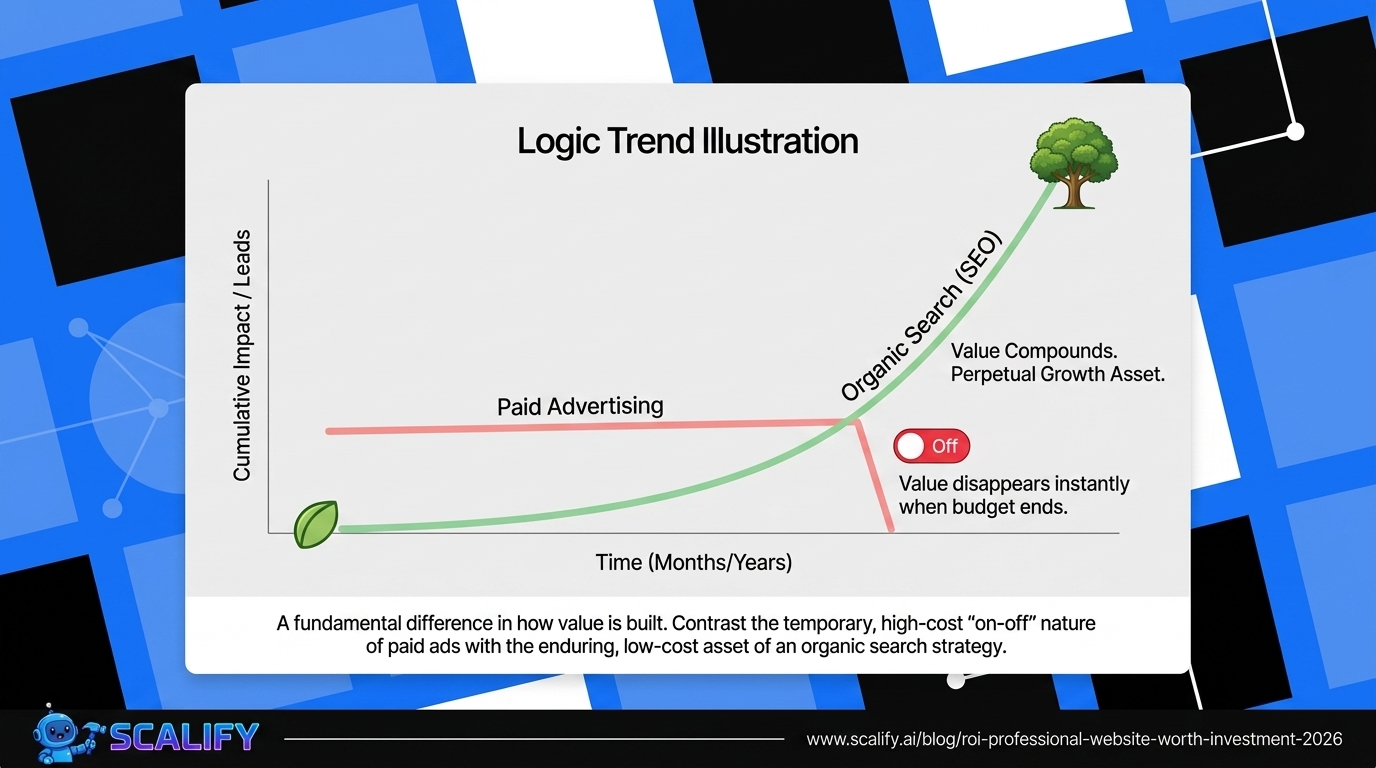
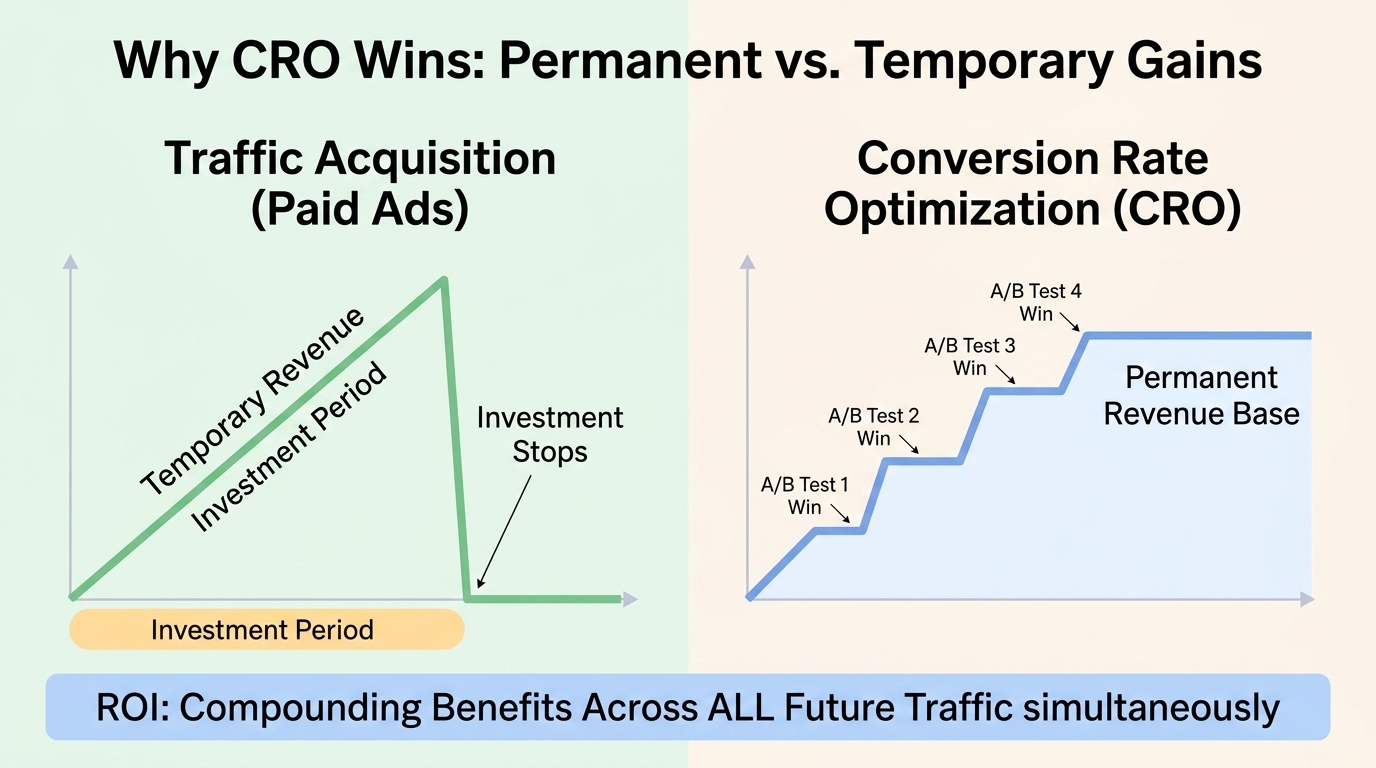
The businesses that achieve the strongest digital marketing outcomes over 3–5 years are consistently those that treat their website as a compounding investment — not a cost that was incurred and is now sunk. Each improvement builds on previous ones: content that ranks brings organic traffic that generates leads that fund more content investment. Backlinks earned improve rankings for future content. Performance improvements make every marketing dollar more efficient by converting more of the traffic those campaigns generate. This compounding structure means the businesses that start investing systematically earliest build the most durable competitive advantages — and those that defer the investment face increasingly expensive catch-up costs as competitors accumulate authority that takes time to replicate.
The practical starting point for any business that hasn't yet built this system: set up Google Analytics 4 and Search Console if not already in place, establish baseline metrics for organic traffic, conversion rate, and Core Web Vitals, and identify the single highest-impact improvement available based on those metrics. Implement that improvement, measure the result after 30 days, and plan the next improvement. This iterative discipline, maintained consistently, produces the compounding returns that transform a business's digital marketing from a cost center into one of its most valuable revenue-generating assets.
At Scalify, our websites are built with analytics, performance optimization, and SEO foundations that give every business the starting point for this compounding improvement discipline — delivered professionally in 10 business days.
Image Optimization as a Competitive Advantage
While image optimization is a technical discipline, its business impact is primarily commercial: faster-loading pages rank better in search, convert at higher rates, and provide better user experiences that drive return visits and recommendations. The competitive landscape for most businesses includes competitors who have not systematically optimized their images — meaning a business that does optimize gains measurable performance advantages in both search visibility and conversion efficiency that compound over time. WebP conversion, proper compression, lazy loading, LCP preloading, and descriptive alt text are not advanced technical requirements — they're basic professional standards that every business website should meet. The gap between "optimized" and "unoptimized" in image performance is typically 40–70% page weight reduction and 1–2 second load time improvement — a difference that's immediately visible in Core Web Vitals scores and measurable in both rankings and conversion rates.
The most efficient path to fully optimized images on an existing website: run Google PageSpeed Insights on your most important pages, address the "Properly size images" and "Serve images in modern formats" opportunities first (highest impact), then systematically work through the remaining recommendations in order of estimated time savings. For new websites, build image optimization into the publishing workflow from launch — compress before uploading, use WebP by default, add alt text as part of image selection, and implement lazy loading in the page template so every image benefits automatically without per-image effort. At Scalify, image optimization is built into every website we deliver — not a post-launch remediation but a foundational standard that every client benefits from from day one.


.jpeg)
.jpeg)


78 SW 7th St, Miami, FL 33130