
How to Plan a Website Before You Build It
By Josh Ternyak

March 29, 2026
Most websites fail before a single line of code is written — because planning was skipped. This guide walks you through the exact planning process that separates websites that convert from websites that collect dust.
The Work Before the Work
The most expensive website mistakes happen before design begins. Not in the pixel spacing or the font choices or the button colors — in the foundational decisions about what the website is supposed to do, who it's supposed to serve, and how it's going to accomplish those goals. Skip this planning phase and you'll make these decisions implicitly, under pressure, while the project is in motion — and you'll make worse decisions than you would have with time to think clearly.
Professional web agencies charge separately for discovery and strategy phases because they've learned, expensively, that jumping straight to design without proper planning produces sites that need to be significantly revised or completely redone. The planning phase isn't overhead — it's the work that makes all the subsequent work pay off.
This guide walks through every step of website planning: defining goals, understanding your audience, mapping content and information architecture, choosing the right platform, and setting up your project for success before anyone opens a design tool.
Step 1: Define Your Goals With Specificity
Every website has a purpose. The mistake most businesses make is defining that purpose too vaguely: "have an online presence," "look professional," "show what we do." These are not goals — they're descriptions of what a website is. Goals are outcomes you can measure.
Specific website goals:
- Generate 10 qualified leads per month from organic search
- Reduce time spent on customer support by enabling self-service answers
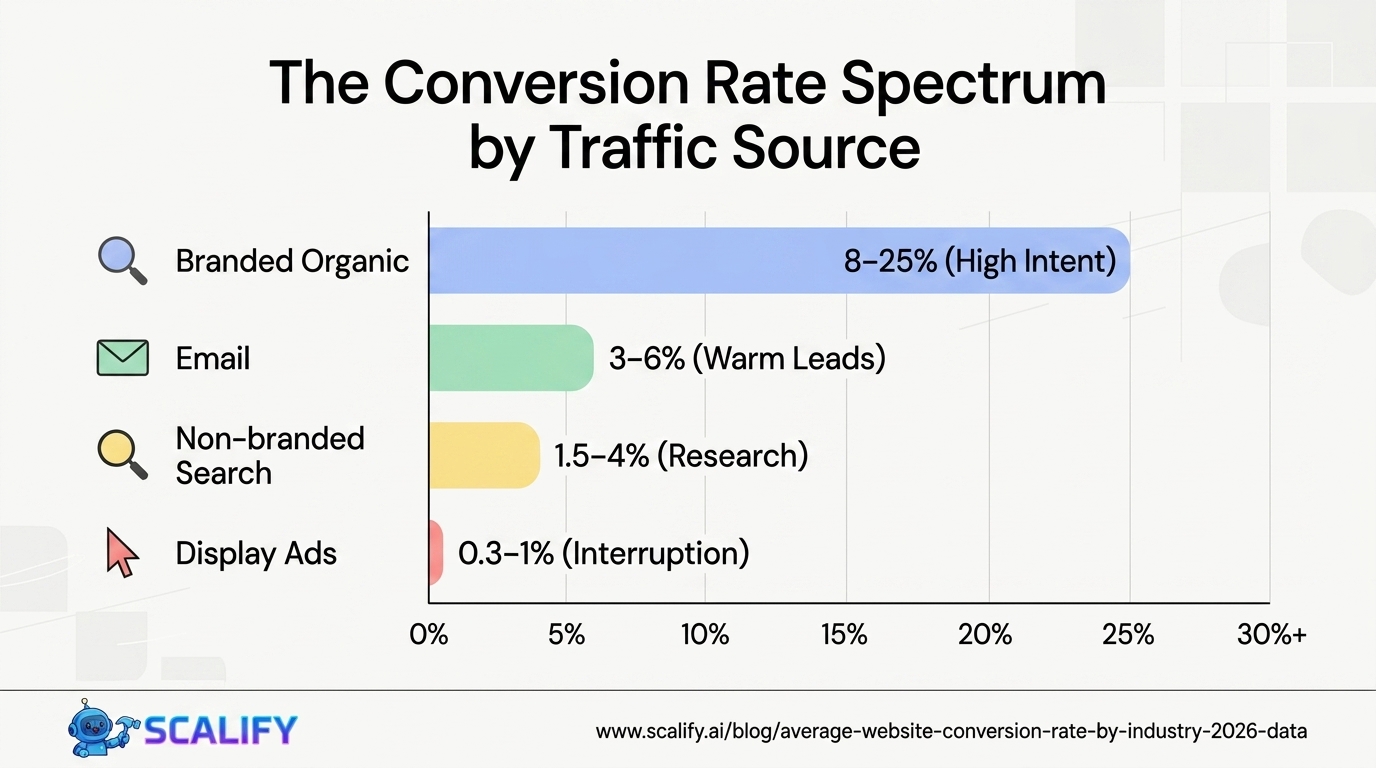
- Increase e-commerce conversion rate from 2% to 3.5%
- Build an email list of 500 subscribers in the first 6 months
- Enable online booking to replace the 40% of scheduling currently done by phone
Specific goals change every downstream decision. A website built to generate leads has different page priorities, different CTAs, different content strategy, and different success metrics than a website built to reduce support volume. If you start designing before you know which of these you're building, you're designing something generic that serves neither purpose well.
For each goal, define: what success looks like, how you'll measure it, what the current baseline is (if any), and what timeline you expect to achieve it. This forces clarity about what "the website working" actually means for your specific business.
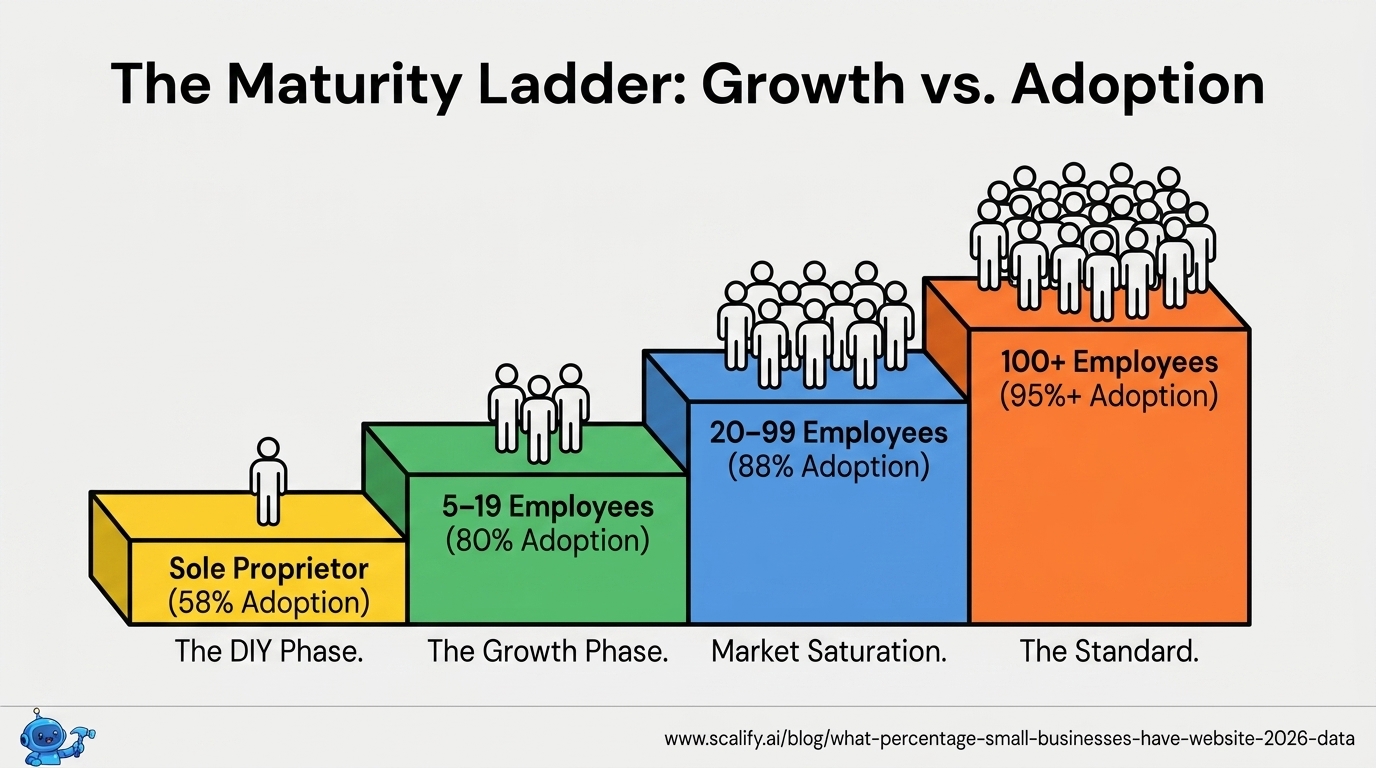
Step 2: Know Your Audience in Depth
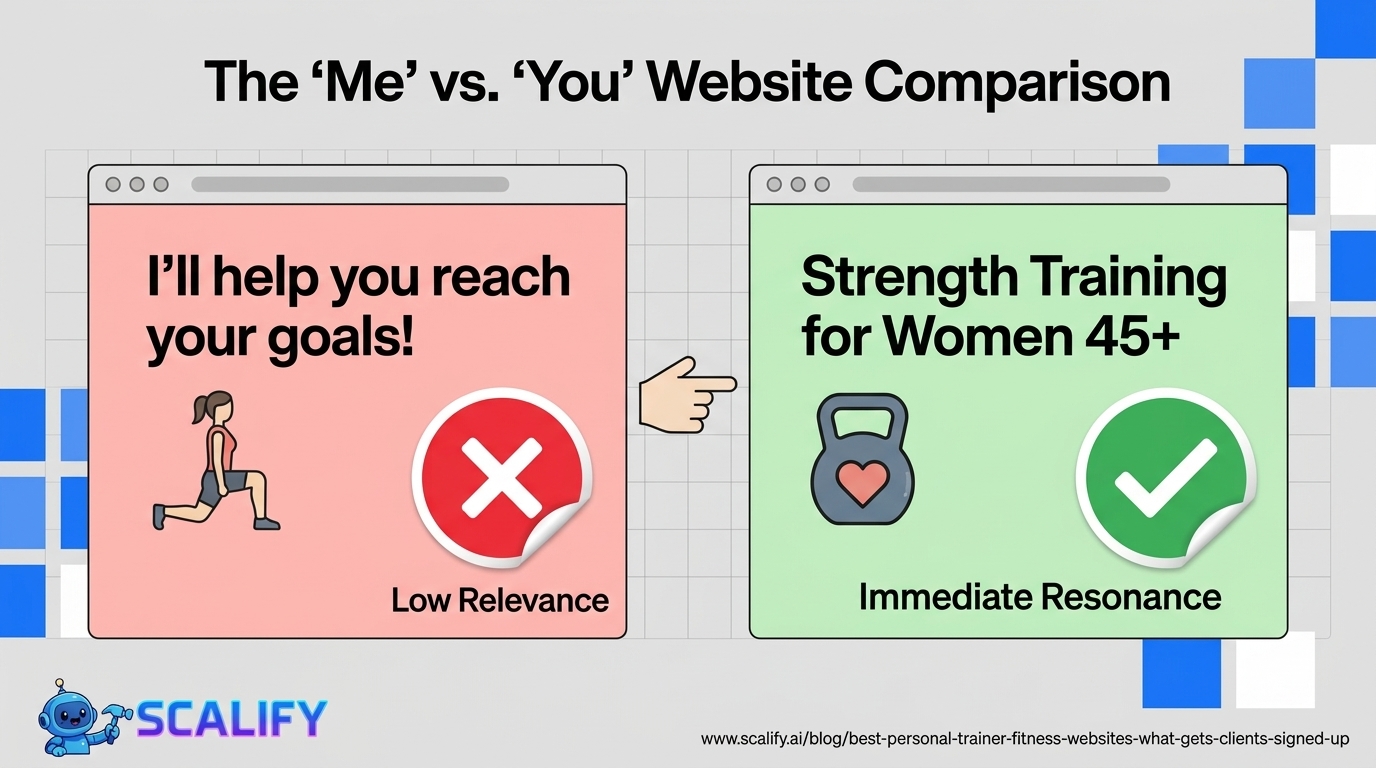
Websites serve people. Before designing for people, you need to understand who those people are, what they need, how they make decisions, and what language they use to describe their situations. Without this understanding, every design and content decision is guesswork.
Primary vs. Secondary Audiences
Most websites serve multiple audience types. A law firm's website is used by potential clients evaluating whether to hire the firm, existing clients looking for contact information or document access, potential employees evaluating the firm as an employer, and referral sources evaluating the firm's expertise. These audiences have different needs and respond to different content.
Identify your primary audience (the most important, whose needs drive the site's primary design) and secondary audiences (whose needs must be considered but don't dominate). The homepage speaks to the primary audience. Secondary pages (careers, press, partners) serve secondary audiences.
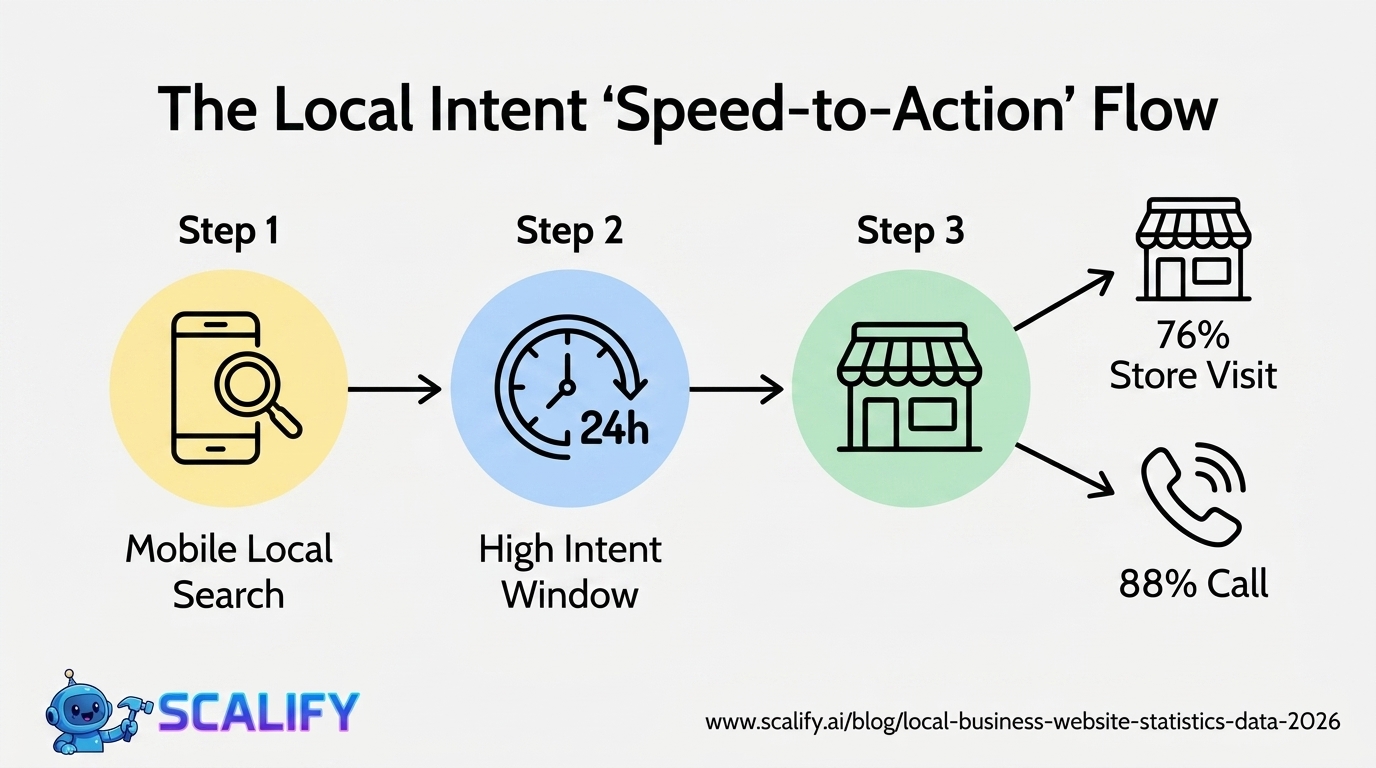
Understanding Audience Intent
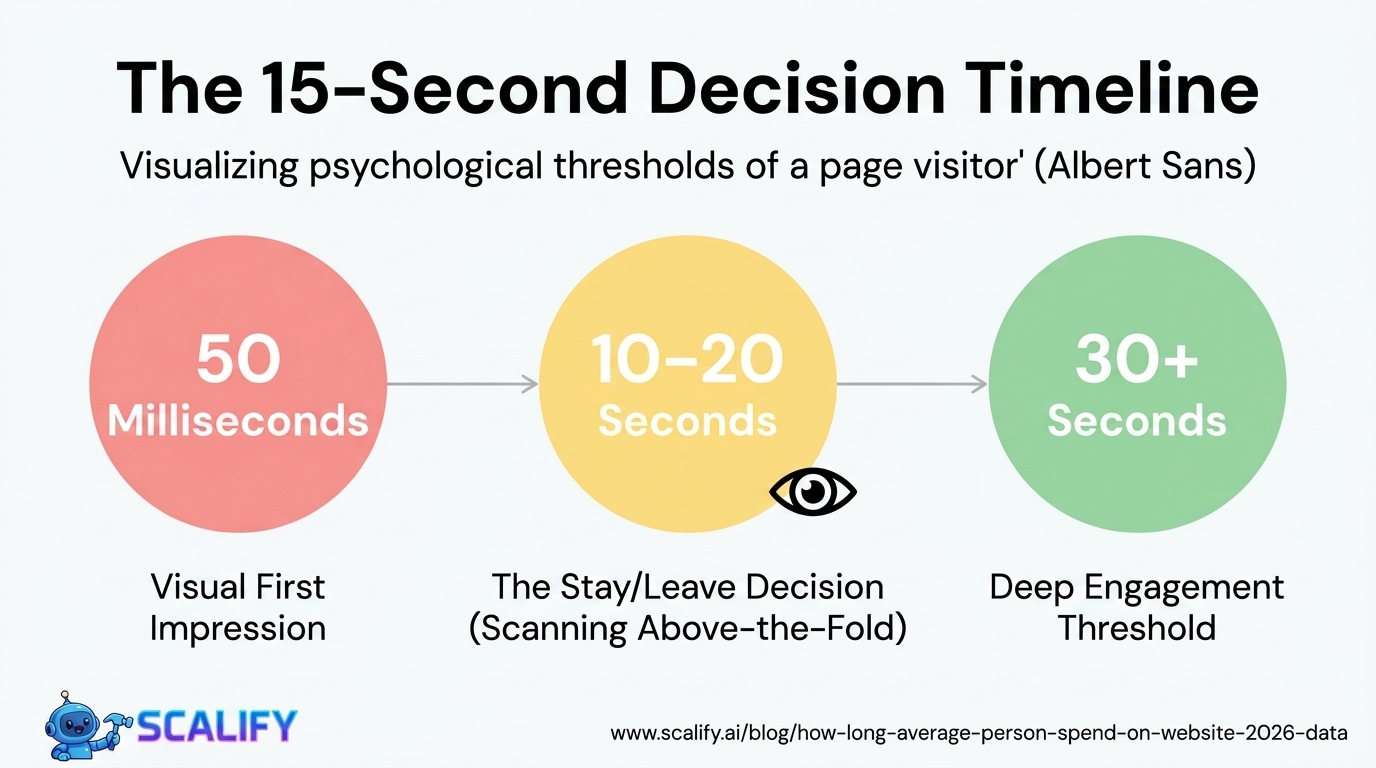
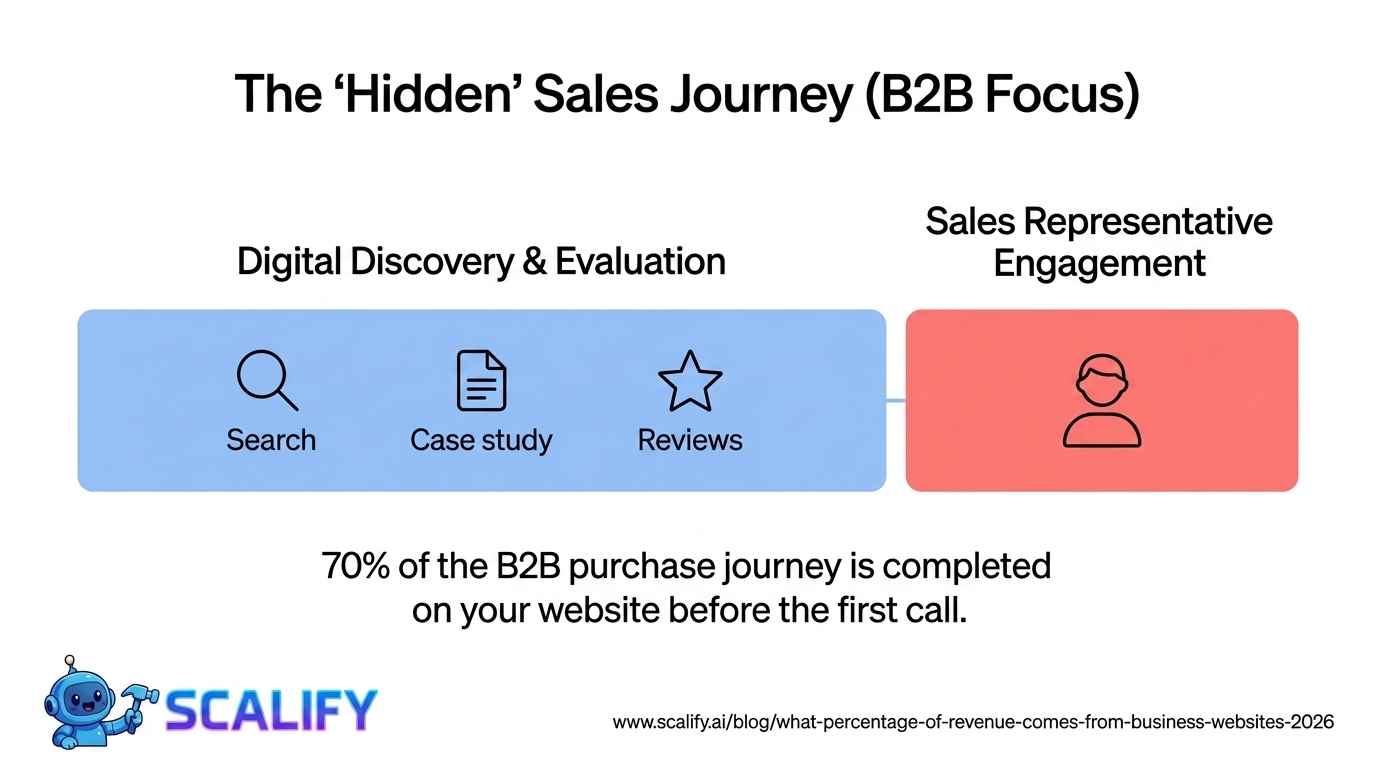
For each audience segment: what are they trying to accomplish when they visit your website? What questions do they need answered before they can take action? What fears or concerns do they have that might prevent them from taking action?
A useful exercise: write down the top 5 questions someone in your primary audience asks before deciding to hire a business like yours. Now look at your current (or planned) website. Does it answer those questions prominently and specifically? If not, the site is failing the audience at the evaluation stage.
Audience Research Methods
Don't guess at your audience's needs — research them:
- Existing customer interviews: Ask 5–10 recent customers how they found you, what questions they had before hiring you, what information would have been most helpful, and what they wish they'd known earlier in the process
- Sales call notes: What questions come up repeatedly in initial consultations? What objections do prospects raise?
- Support ticket analysis: What questions do existing customers ask repeatedly? These are questions the website should answer
- Search data: What queries are people searching to find businesses like yours? Google Keyword Planner, Ahrefs, or Semrush reveal the language your audience uses
Step 3: Audit Existing Assets and Content
Unless this is a brand new business, you have existing content assets worth inventorying before planning new content. This prevents redundant creation work and ensures valuable existing content is incorporated rather than lost.
Inventory:
- Current website pages — which are worth preserving, updating, or retiring?
- Existing blog posts or articles — which are performing well in search and should be migrated?
- Photography — what do you have? What quality level? What's missing?
- Videos — are there existing brand or product videos worth featuring?
- Testimonials and case studies — what client success stories exist that can be formalized?
- PDFs and documents — whitepapers, guides, or resources that could be offered as lead magnets
- Brand assets — logos in what formats, brand guidelines, approved color and typography specs
If the site has existing organic search traffic, a full URL audit in Screaming Frog plus a Google Search Console export gives you the data to preserve what's working. The redirects from old URLs to new ones are part of the plan — not an afterthought.
Step 4: Define Your Site Architecture
Information architecture (IA) is how your site's content is organized and how visitors navigate through it. Before any design begins, you need a sitemap — a complete map of every page, its relationship to other pages, and the navigation structure that connects them.
Building the Sitemap
Start with the pages you know are required:
- Homepage
- Primary service or product pages (one per service or product category)
- About page
- Contact page
- Any legally required pages (Privacy Policy, Terms of Service)
Then add content pages based on your audience and goals: blog or resources section (if content marketing is part of the strategy), case studies or portfolio, team page, FAQ, careers (if relevant), and any specialized landing pages for campaigns or specific audiences.
For each service or product you offer, ask: does this get its own dedicated page, or does it live within a parent service page? Dedicated pages allow deeper keyword targeting and more specific content; parent pages keep the site simpler. The right answer depends on how differentiated each service is and how much unique content you can produce for each.
Navigation Architecture
Once you have a complete sitemap, design the navigation structure. What goes in the primary navigation? What goes in the footer? What requires dropdown menus? The primary navigation should contain the 5–7 most important destinations — the pages your primary audience most needs to find.
The test for what belongs in primary navigation: if a visitor can only see your navigation, would they be able to find the 3 most important things they came for? If no, the navigation needs restructuring.
Step 5: Plan Your Content
Content planning before design prevents the most common website project delay: content bottlenecks. Designers cannot design without knowing what content goes in each section. When content arrives late, projects stall.
Content Inventory by Page
For each page in your sitemap, define:
- Primary goal: What action should visitors take after reading this page?
- Key messages: The 3–5 most important things this page must communicate
- Content sections: What sections will the page contain?
- Content sources: Does this content exist already (needs editing) or needs to be created fresh?
- Content owner: Who in your organization will provide or approve this content?
- Images needed: What photography or graphics does this page require?
Identifying Content Gaps
Content planning often reveals that important pages have no existing content to work from. The homepage hero headline, the service page value propositions, the case studies that don't exist yet — these gaps need time to fill, and that time should be in the plan, not a surprise during design.
The earlier content gaps are identified, the earlier they can be addressed. Content creation (especially quality copywriting) takes longer than most people estimate — building buffer time for content production into the project plan prevents it from becoming the reason the site launches late.
Step 6: Define Functionality Requirements
What does the website need to DO, beyond displaying information? Functionality requirements drive platform and development decisions.
Common functionality requirements:
- Contact forms: Simple email form vs. multi-step qualification form vs. booking system
- E-commerce: Product catalog, cart, checkout, inventory management, payment processing
- CMS requirements: Who will update the site? How often? What content types? How technically capable are they?
- Integrations: What existing tools need to connect? CRM, email platform, appointment scheduling, marketing automation, analytics, live chat
- User accounts: Do visitors need to log in? What can logged-in users do?
- Search: Does the site need internal search? For what content types?
- Multilingual: Does the site need to serve audiences in multiple languages?
Document every functionality requirement before platform selection. Some requirements rule out certain platforms — a complex custom approval workflow can't be built in Squarespace. Discovering a critical requirement after platform selection means either changing platforms or compromising the requirement.
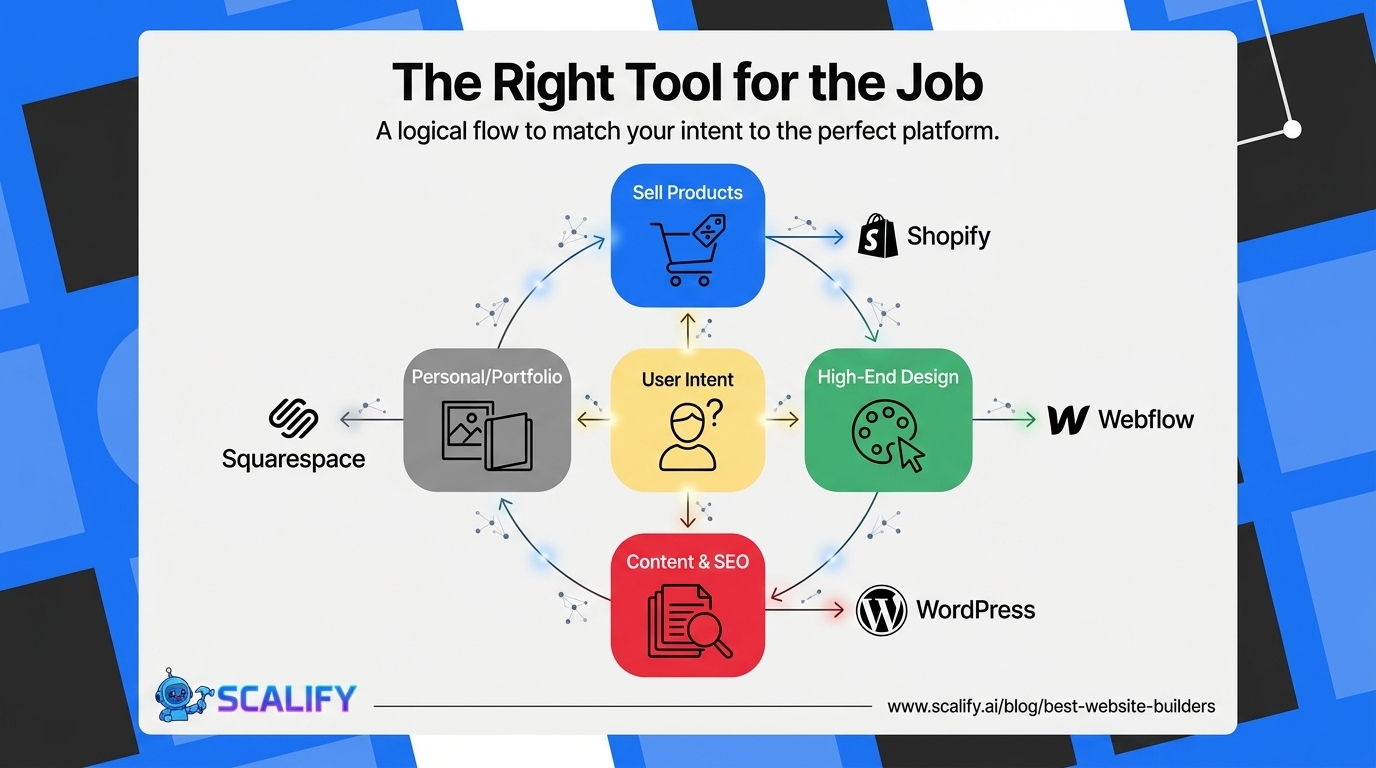
Step 7: Choose the Right Platform
Platform selection should follow requirements, not precede them. The right platform is the one that best handles your specific requirements at your budget level with your technical capability.
Webflow: Best for design-forward marketing websites and content sites where visual quality and design control are paramount. No server management. Excellent CMS. Limited to what Webflow supports natively — complex custom functionality requires workarounds or external tools.
WordPress: Best when deep customization is needed, there's significant existing content in WordPress, or the team has WordPress expertise. Enormous plugin ecosystem. Requires hosting management and active security maintenance. More technical overhead than hosted platforms.
Shopify: Best for e-commerce. Purpose-built commerce platform with excellent payment processing, inventory management, and order management. Less design flexibility than Webflow; more commerce functionality than any general website builder.
Squarespace: Best for small, simple sites where ease of self-management is the priority. Less customizable than other options; faster to set up. Good for service businesses with simple needs.
Custom development: Required when no platform supports critical functionality requirements. Most expensive and most flexible. Appropriate for complex web applications, unusual requirements, or businesses that need control over every technical decision.
Step 8: Define Technical Requirements
Beyond platform, document specific technical requirements:
- Performance targets: Minimum acceptable Core Web Vitals scores, maximum page load times
- SEO requirements: URL structure, redirects from existing content, specific schema types
- Analytics: Which analytics platforms, what events need tracking, what conversion actions
- Security: SSL, data handling requirements, compliance (GDPR, HIPAA, PCI for e-commerce)
- Accessibility: WCAG compliance level target
- Hosting: Expected traffic, geographic locations of audience, uptime requirements
Step 9: Set Your Budget and Timeline
With goals, audience, architecture, content plan, functionality requirements, and platform selection defined, you can now set a realistic budget and timeline.
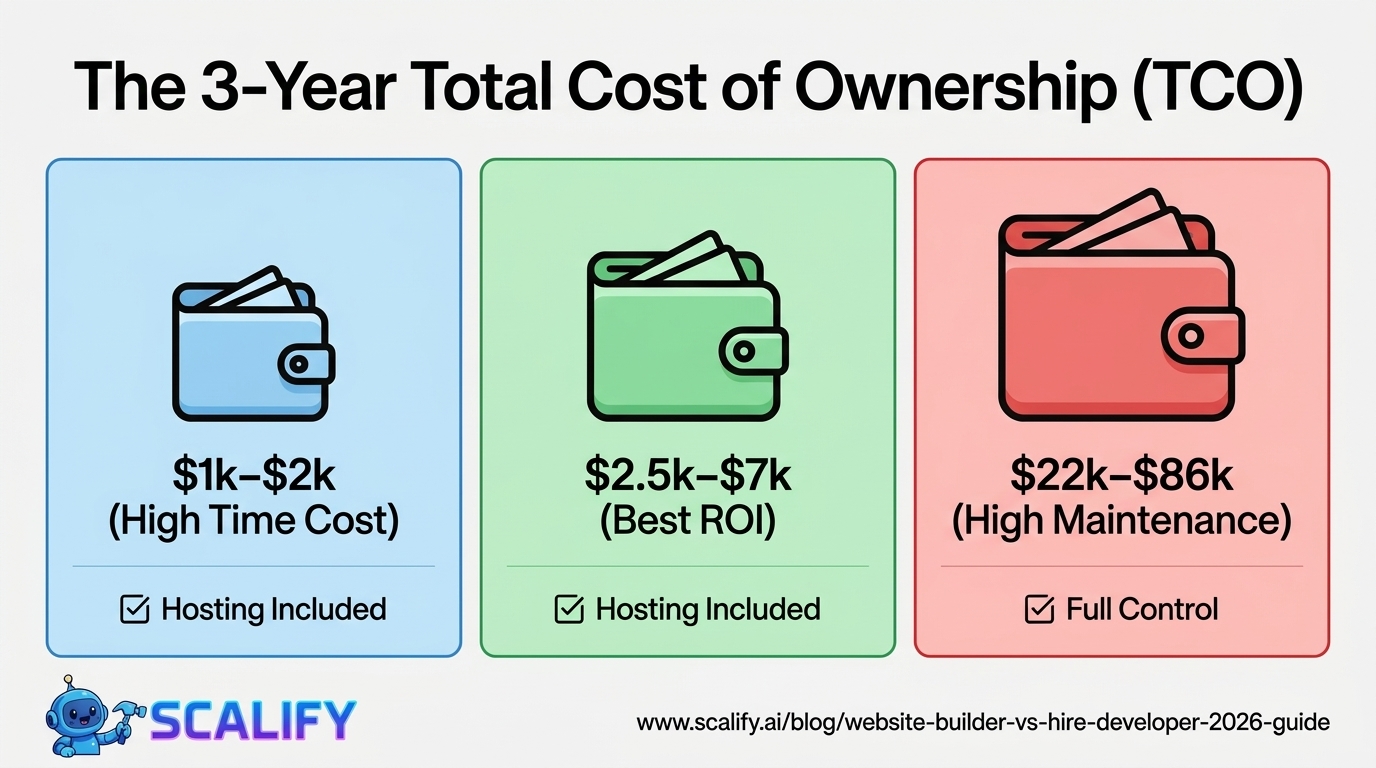
Budget allocation: For most web projects, the budget should be allocated roughly: 25–35% design, 35–45% development, 15–25% content (if professional copywriting is included), 5–10% project management and QA, 5–10% contingency.
Timeline planning: Build the timeline backward from your target launch date. Key milestones: content ready (before design begins), wireframes approved, design approved, development complete, QA and revisions, launch. Add buffer — content always takes longer than planned, and one revision round always turns into two.
Step 10: Create Your Website Brief
Document everything you've defined in a website brief — a single document that serves as the ground truth for the entire project. A good website brief includes:
- Business background and context
- Goals with success metrics
- Target audience profiles
- Sitemap and navigation structure
- Functionality requirements
- Platform recommendation with rationale
- Content plan with ownership assignments
- Design direction (visual references, brand guidelines)
- Technical requirements
- Budget range and timeline
- Project team and decision-making authority
This brief does two things: it forces you to think through everything before starting, catching gaps and contradictions early. And it gives whoever builds the site — whether an agency, a freelancer, or your internal team — everything they need to do the work correctly without guessing at your intent.
The Bottom Line
Website planning is not the exciting part of building a website. But it's the part that determines whether the exciting parts — the design, the launch, the first visitor — produce the outcomes you need. The businesses with websites that genuinely work for them invested time in planning before designing. The businesses with websites that look fine but don't convert often skipped this work, made their planning decisions implicitly during the project, and built something that didn't quite fit because the requirements were never clearly defined.
At Scalify, our 10-day delivery model is only possible because we front-load the planning questions — goals, audience, sitemap, content, requirements — in our kickoff process, so the design and development work proceeds on a clear, agreed foundation rather than discovering the plan as we go.


.jpeg)
.jpeg)


78 SW 7th St, Miami, FL 33130